|
|
||
|---|---|---|
| .. | ||
| README.md | ||
README.md
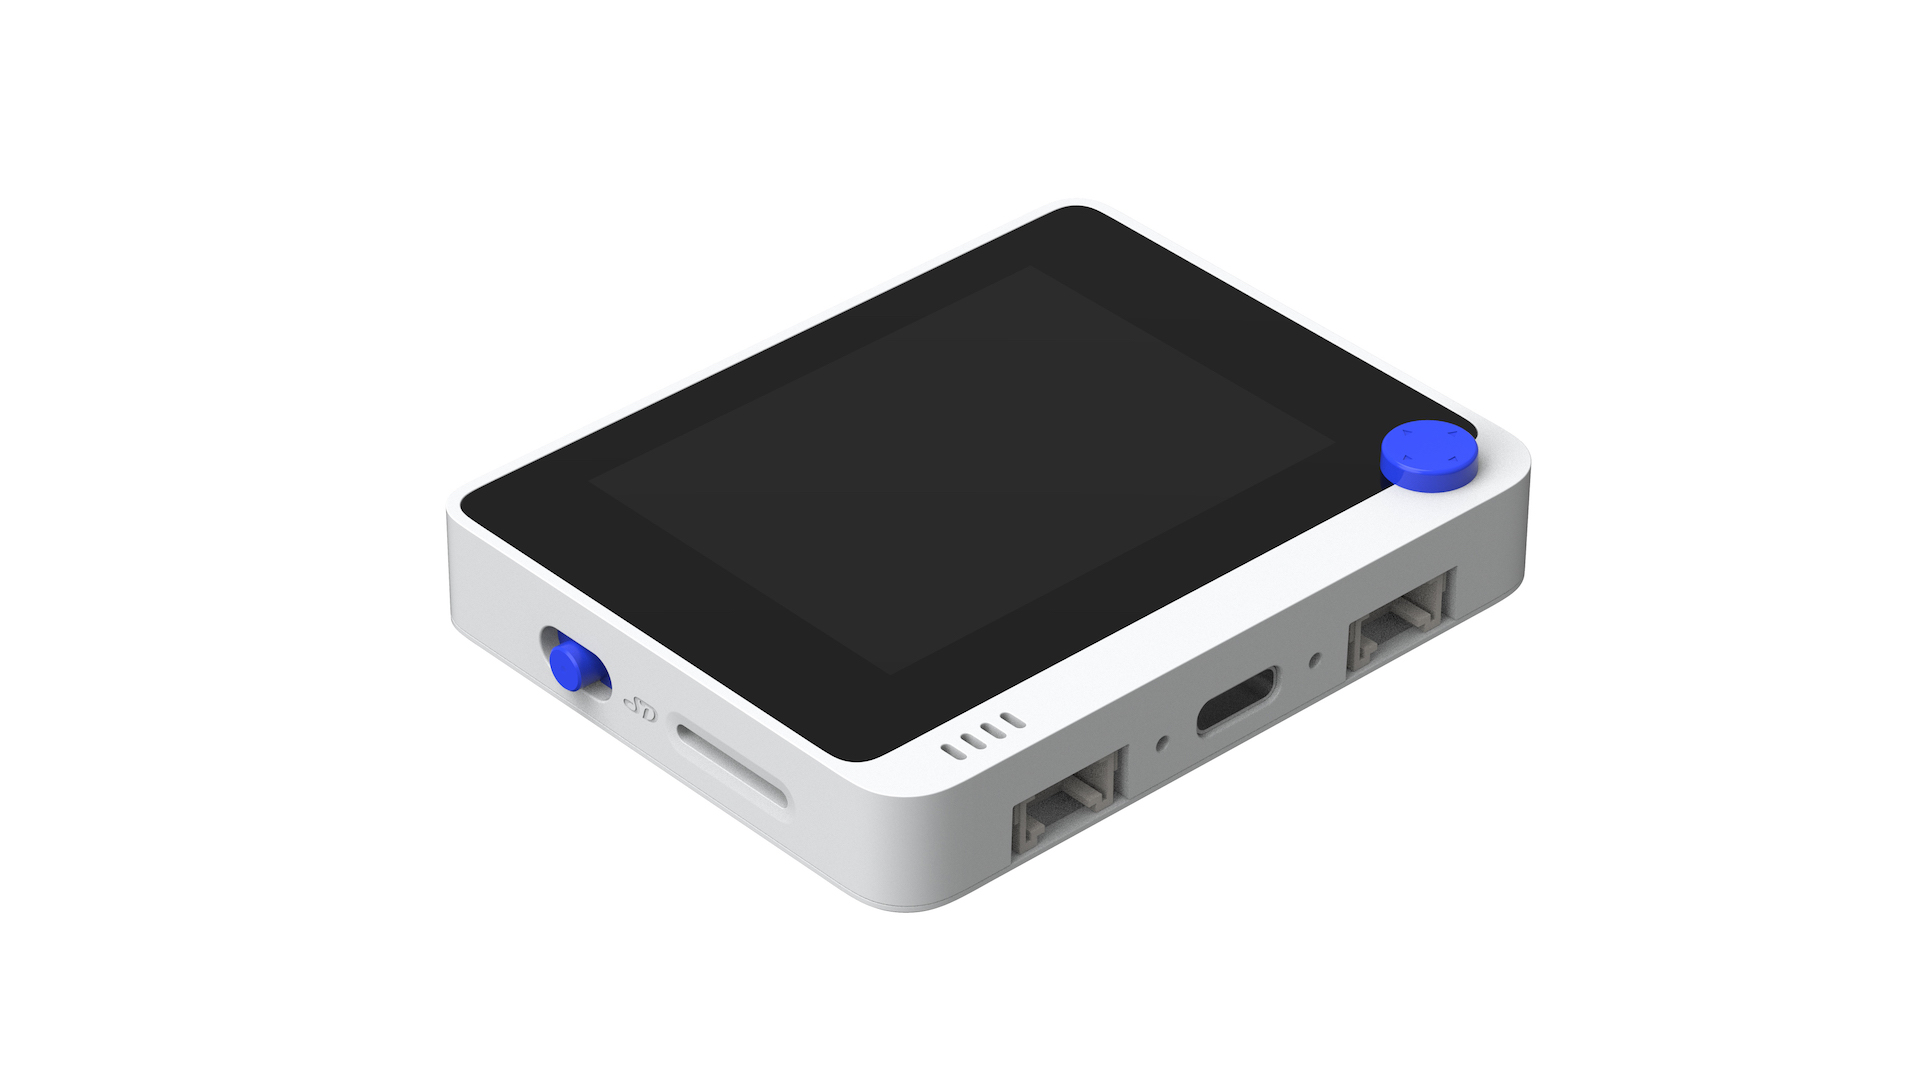
Connect Wio Terminal to Microsoft Azure IoT Central

Introduction
In this tutorial, we will walk you through the process of connecting the Wio Terminal to Microsoft Azure IoT Central and send telemetry data from the onboard sensors/ hardware on the Wio Terminal such as the 3-axis accelerometer, light sensor, 3 buttons to Microsoft Azure IoT Central. Then you will be able to visualize the sensor data on interactive dashboards. Also you will be able to use Azure IoT Central to control hardware such as beeping the onboard buzzer on the Wio Terminal. Microsoft Azure IoT Central supports HTTP, MQTT and AMQP protocols for communication, but, however we will be using the MQTT protocol in this tutorial.
What is Microsoft Azure?
Microsoft Azure is Microsoft's public cloud computing platform. You can use Microsoft Azure to build, test, deploy, and manage applications and services through Microsoft-managed data centers.
Also, it provides a range of cloud services, including compute, analytics, storage and networking. Microsoft Azure provides software as a service (SaaS), platform as a service (PaaS), Infrastructure as a service (IaaS) and serverless. Finally, it supports many different programming languages, tools and frameworks.
What is Microsoft Azure IoT?
Microsoft Azure IoT is a collection of Microsoft-managed cloud services that connect, monitor, and control billions of IoT assets. It includes security and operating systems for devices and equipment, along with data and analytics that help businesses to build, deploy and manage IoT applications.
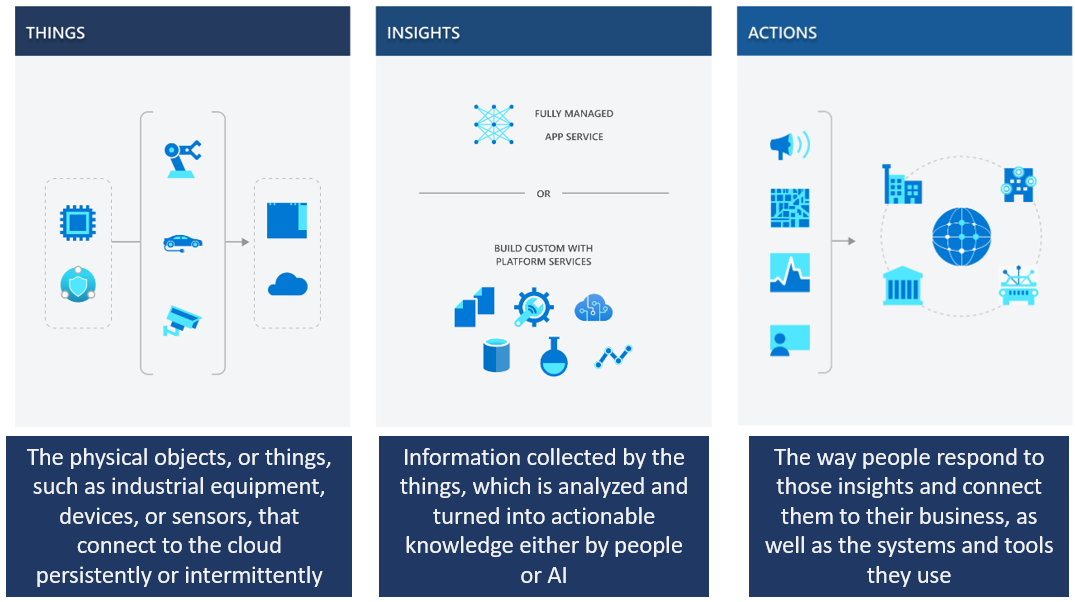
What is Microsoft Azure IoT Central?
Microsoft Azure IoT Central is a fully managed global IoT SaaS (software as a service) solution that makes it easy to connect, monitor and manage your IoT assets at scale. It is highly secure, scales with your business as it grows, ensures that your investments are repeatable and integrates with your existing business apps. It also bridges the gap between your business applications and IoT data. Finally it offers centralized management to reconfigure and update your devices.
What is IoT Plug and Play?
IoT Plug and Play enables solutions builders to integrate smart devices with their solutions without any manual configuration. At the core of IoT Plug and Play, is a device model that a device uses to advertise its capabilities to an IoT Plug and Play-enabled application. It contains:
- Properties: represents the read-only or writable state of a device or other entity
- Telemetry: data sent by a device
- Commands: describes a function or operation that can be done on a device
IoT Plug and Play certified devices eliminate the hassle of configuring devices in Azure IoT Central, such as creating templates and adding features and interfaces.
IoT Plug and Play Certified Devices
IoT Plug and Play Certified Devices are devices listed in the Azure Certified Device Catalog with the IoT Plug and Play badge.
Wio Terminal is an IoT Plug and Play Certified Device.
To be IoT Plug and Play Certified, you will need to clear a few criteria, one of which is to publish a DTDL (Digital Twins Definition Language) model that defines the capabilities of the device to Azure/ iot-plugandplay-models (DMR) on GitHub.
This allows cloud services that use IoT Plug and Play Certified Devices to learn about device capabilities from this repository.

Connecting Wio Terminal to Microsoft Azure IoT Central via MQTT
As explained before, we will be using MQTT for the communication between the Wio Terminal and Microsoft Azure IoT Central. However, you may use the HTTP bridge as well, if that is your requirement.

Microsoft Azure IoT Central Set Up
First, you need to visit Microsoft Azure IoT Central, log in to your Microsoft account and create a new application for your project.
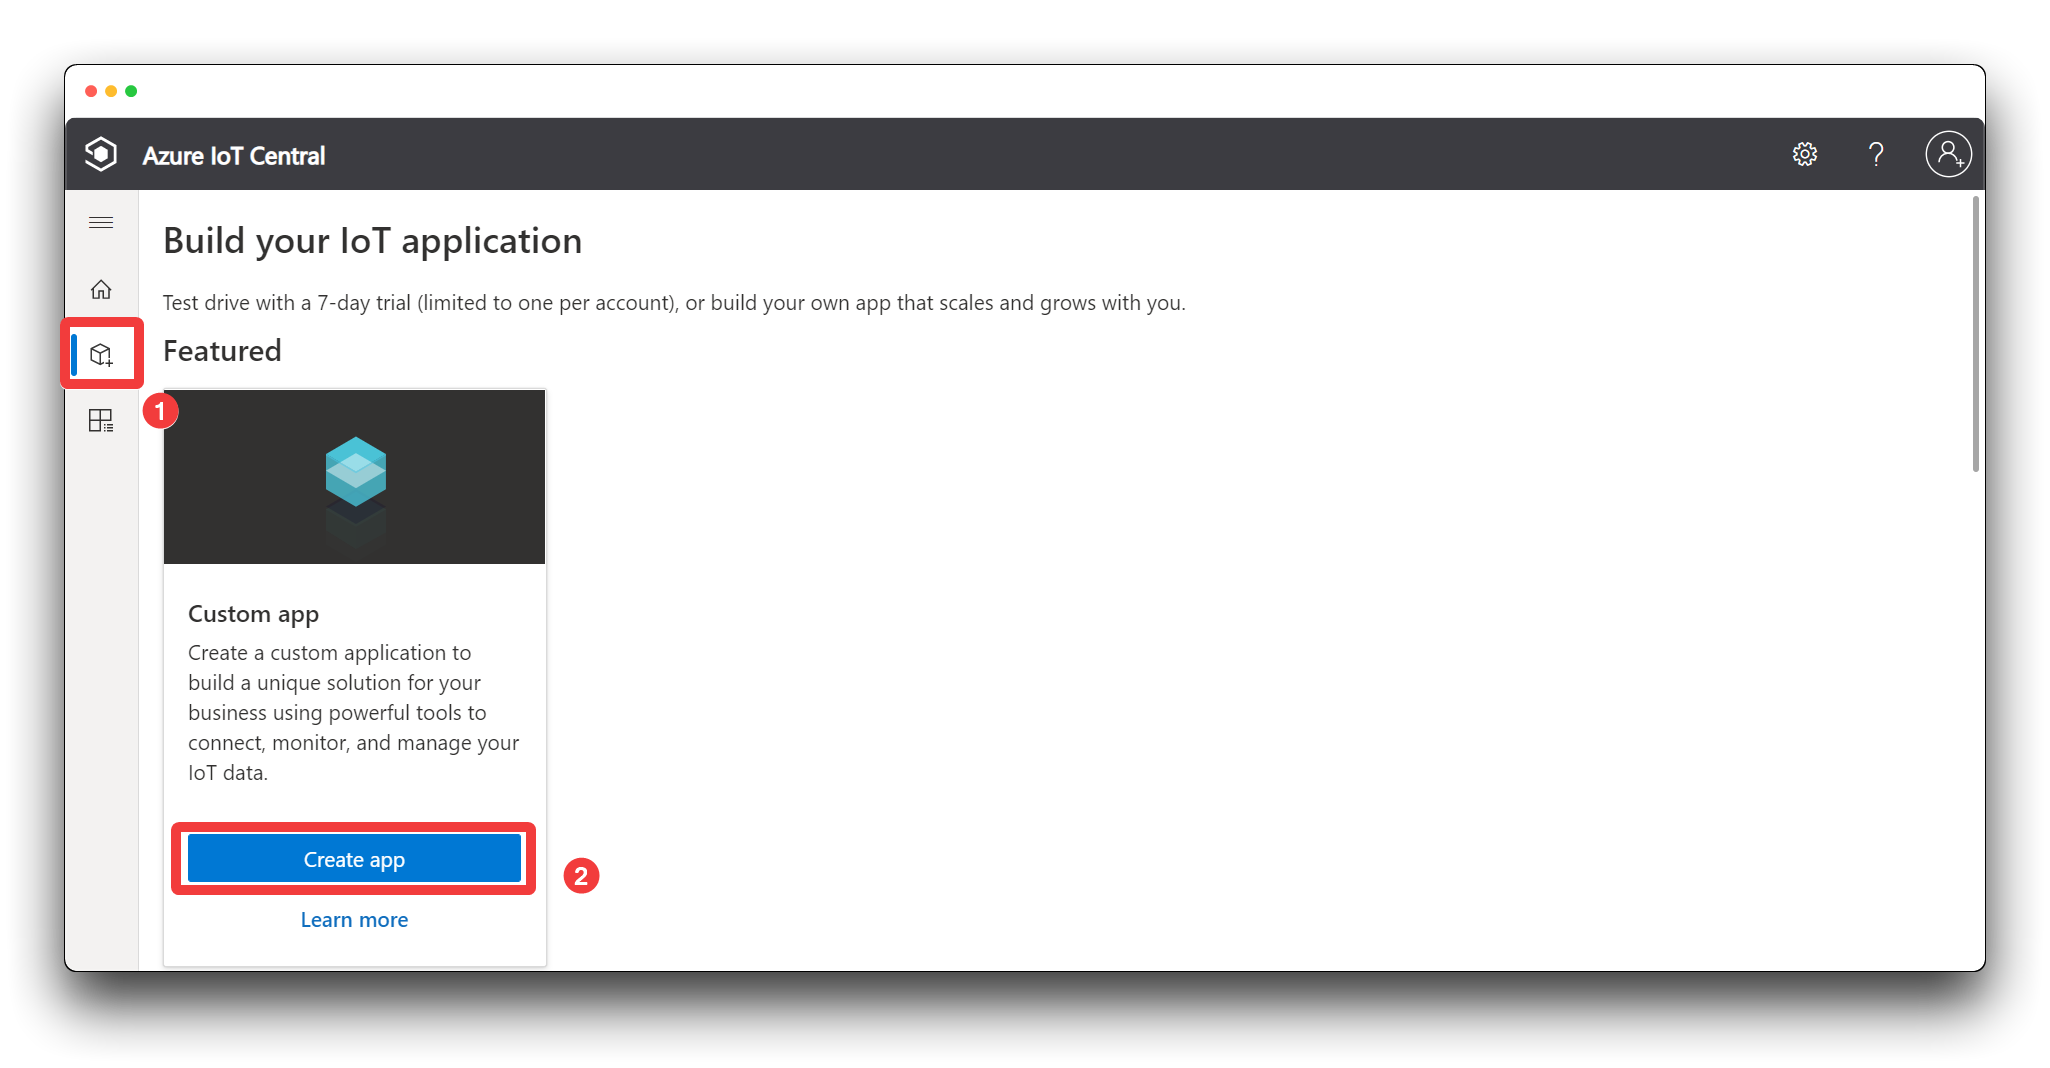
Step 1. Log in to Azure IoT Central.
Please go to the official Azure IoT Central website, click Build from the navigation menu on the left, and click Custom apps.
If you are not already logged into Azure IoT Central, you will be asked to complete a registration/login at this point.
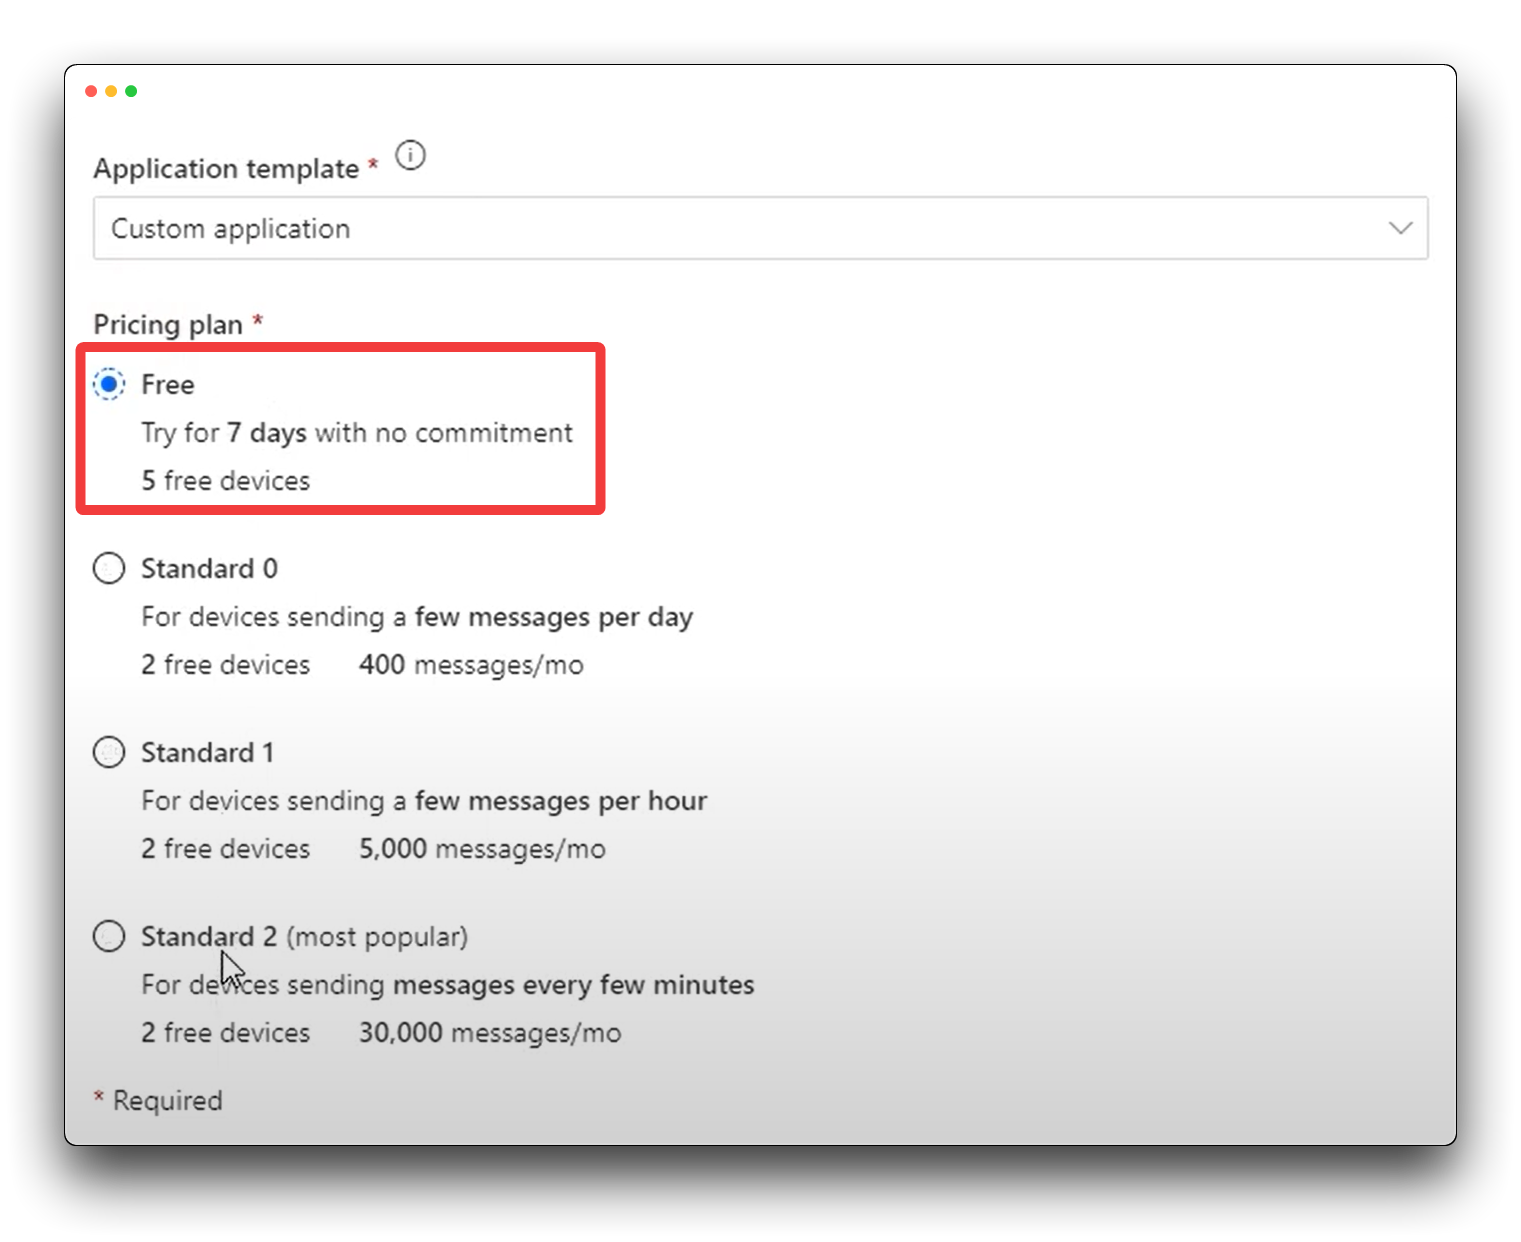
Step 2. Fill in Application name and choose Standard 0 under the Pricing plan. Application URL will be created automatically when you fill in application name. In this example, we will accomplish this task at minimal cost.
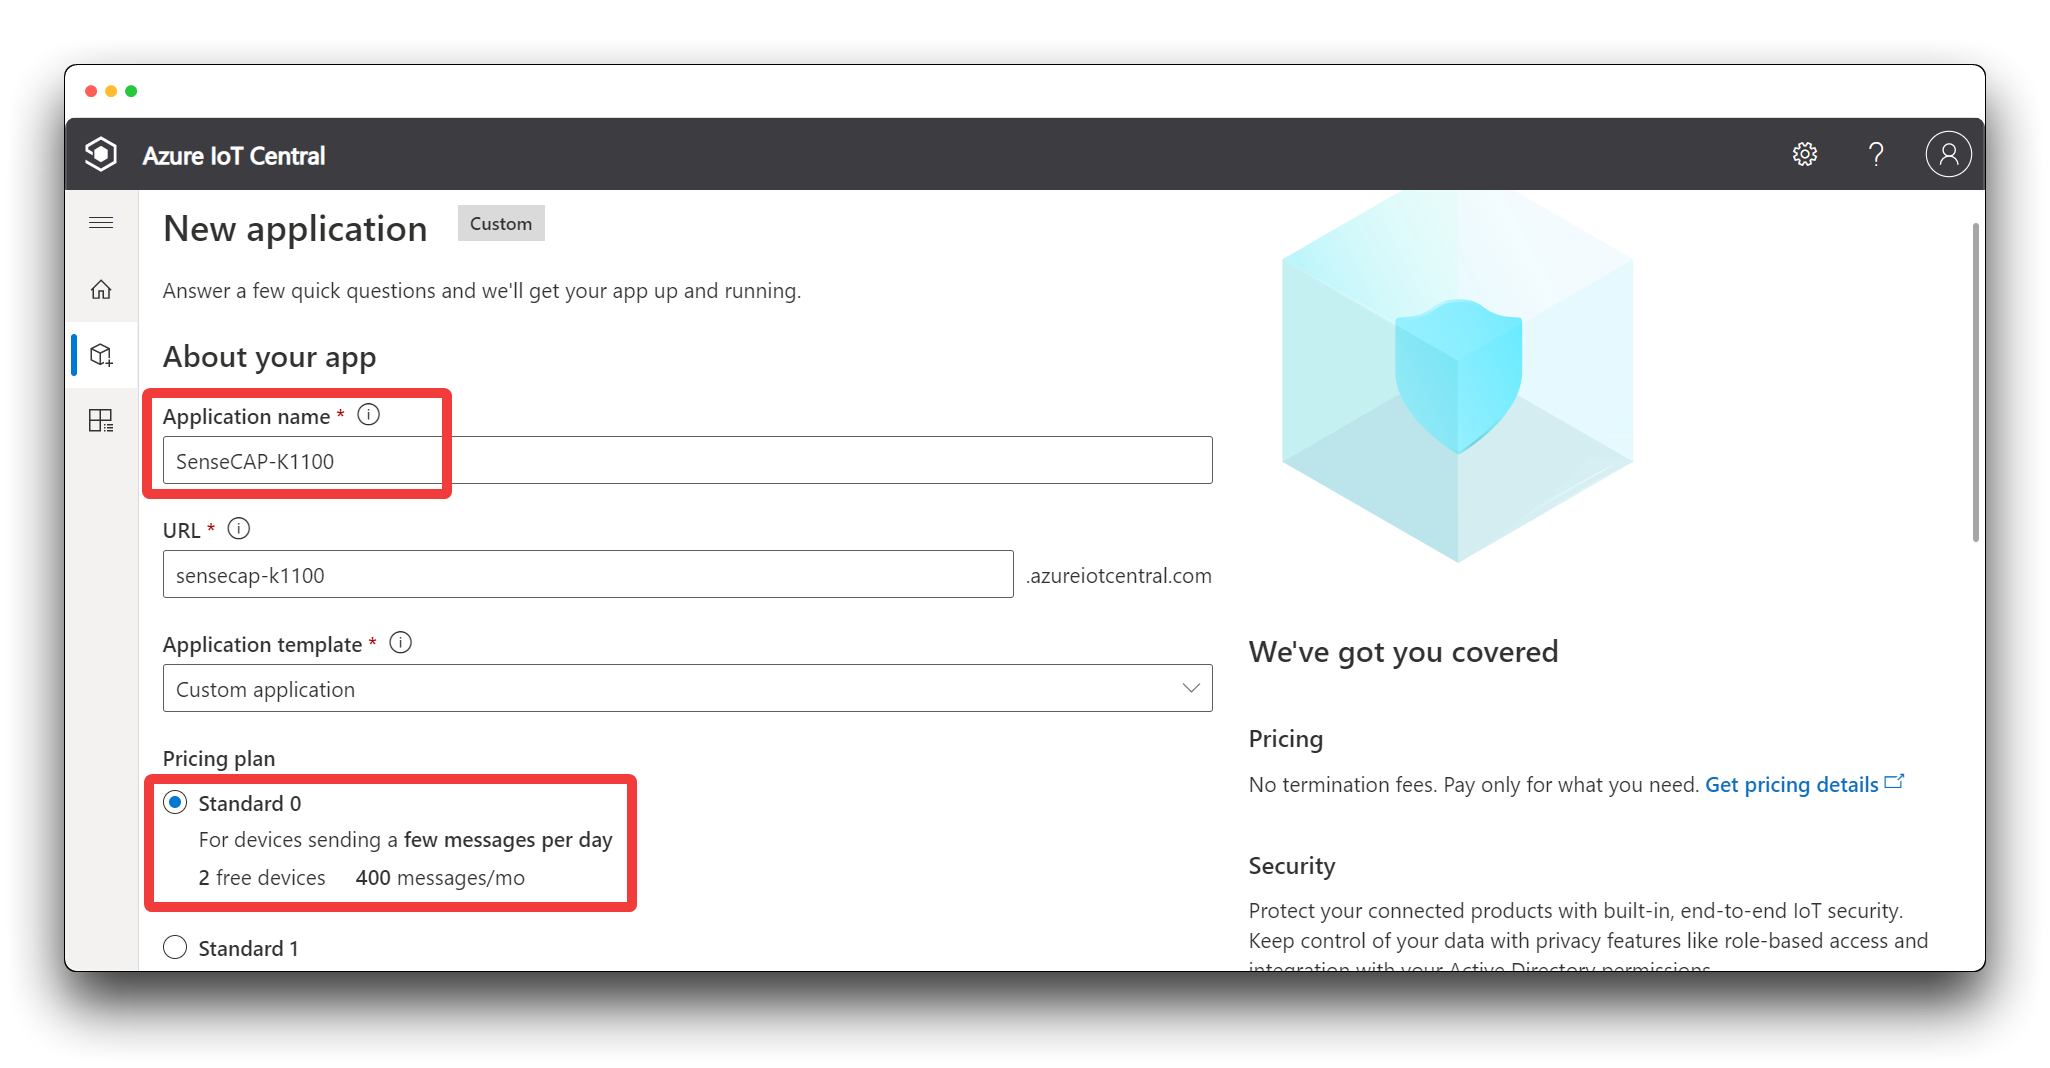
!!!Note If you are a new user of Azure IoT Central, we recommend that you select Free as this will not consume your fees.
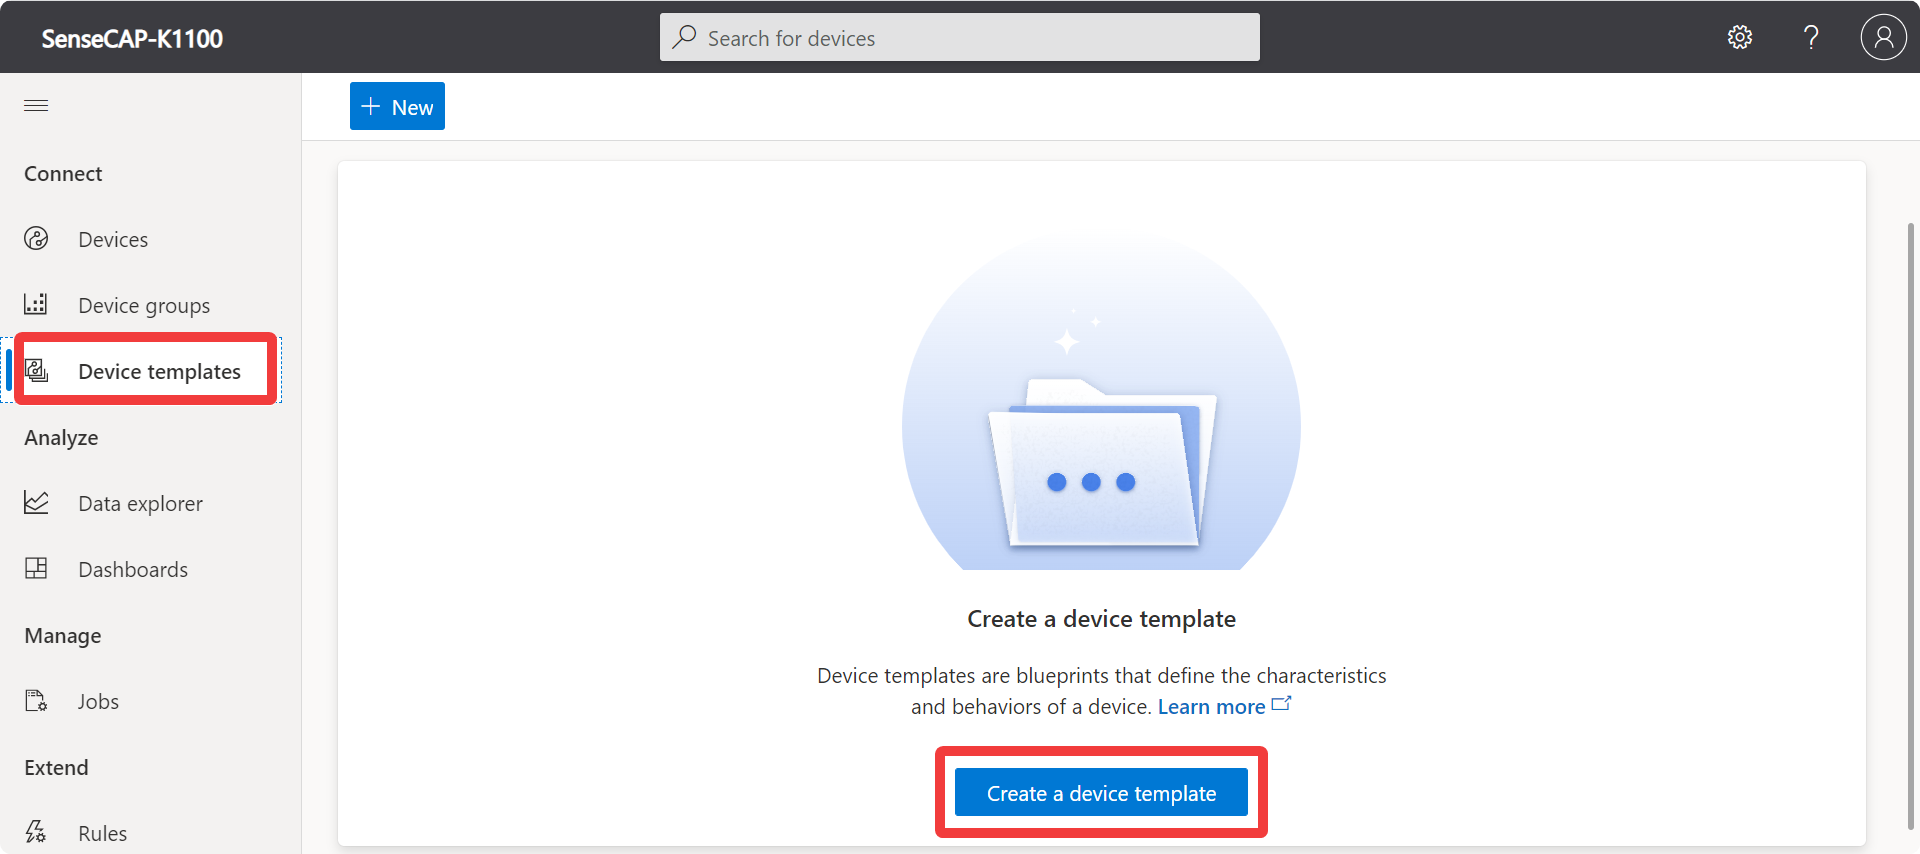
Step 3. Create a Device template
Please create a new device template by clicking on Device templates in the left-hand menu bar.
Please select Wio Terminal as our template.
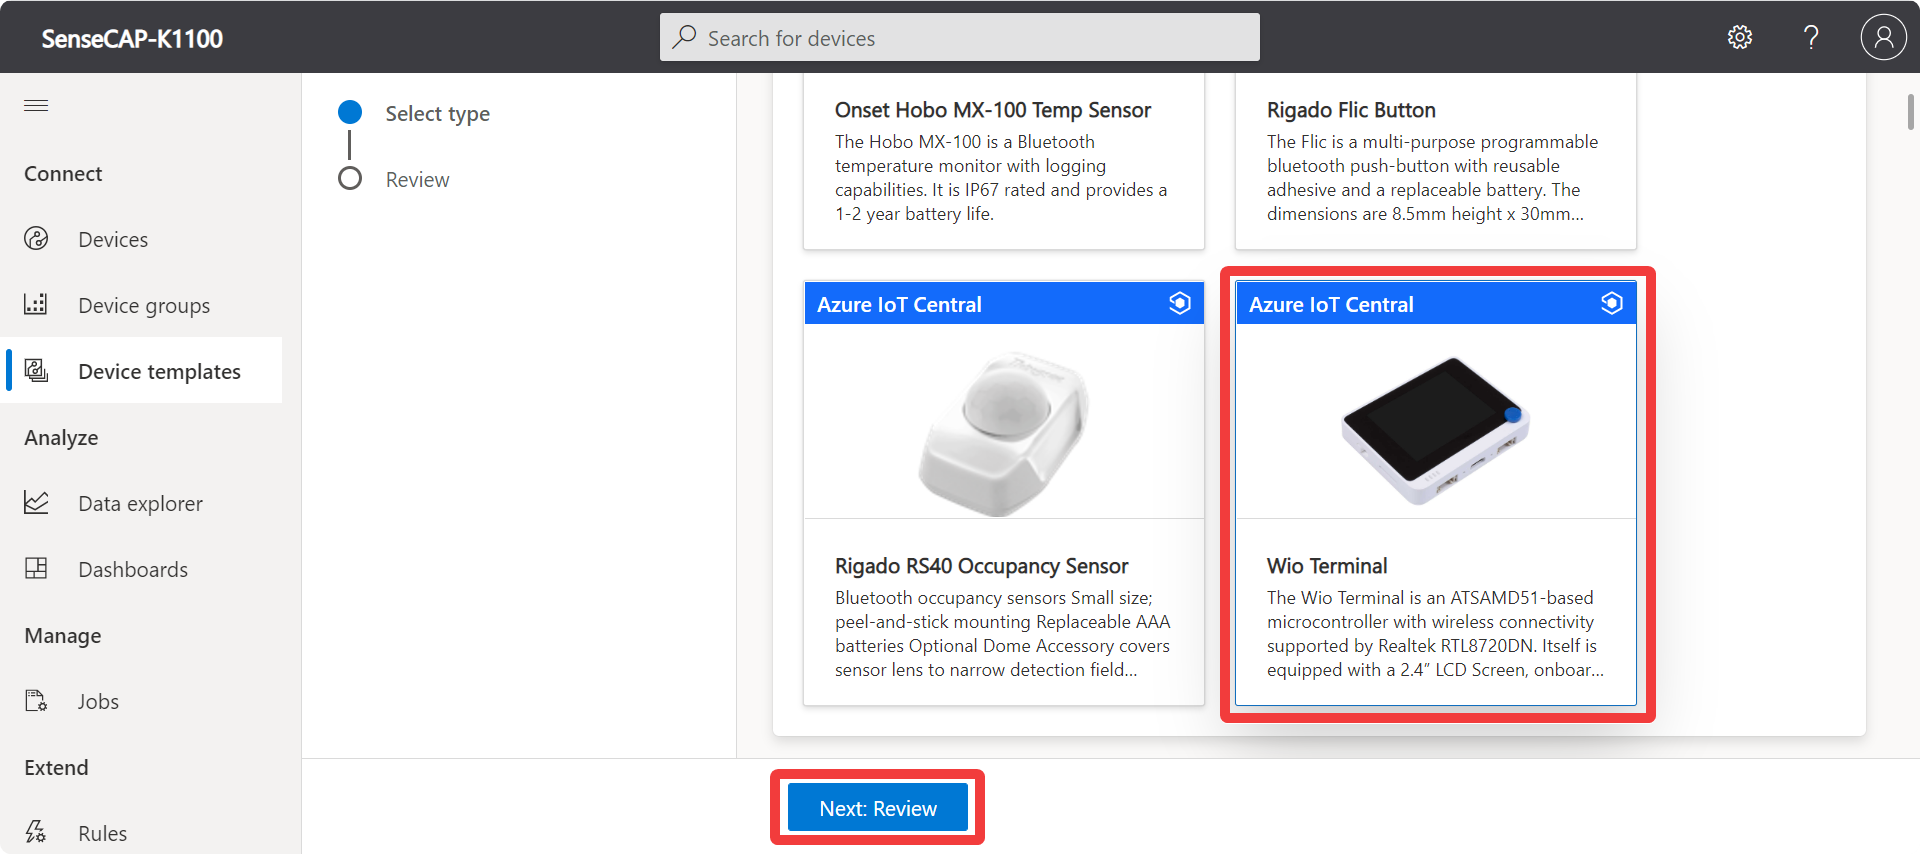
Then just click on Create.
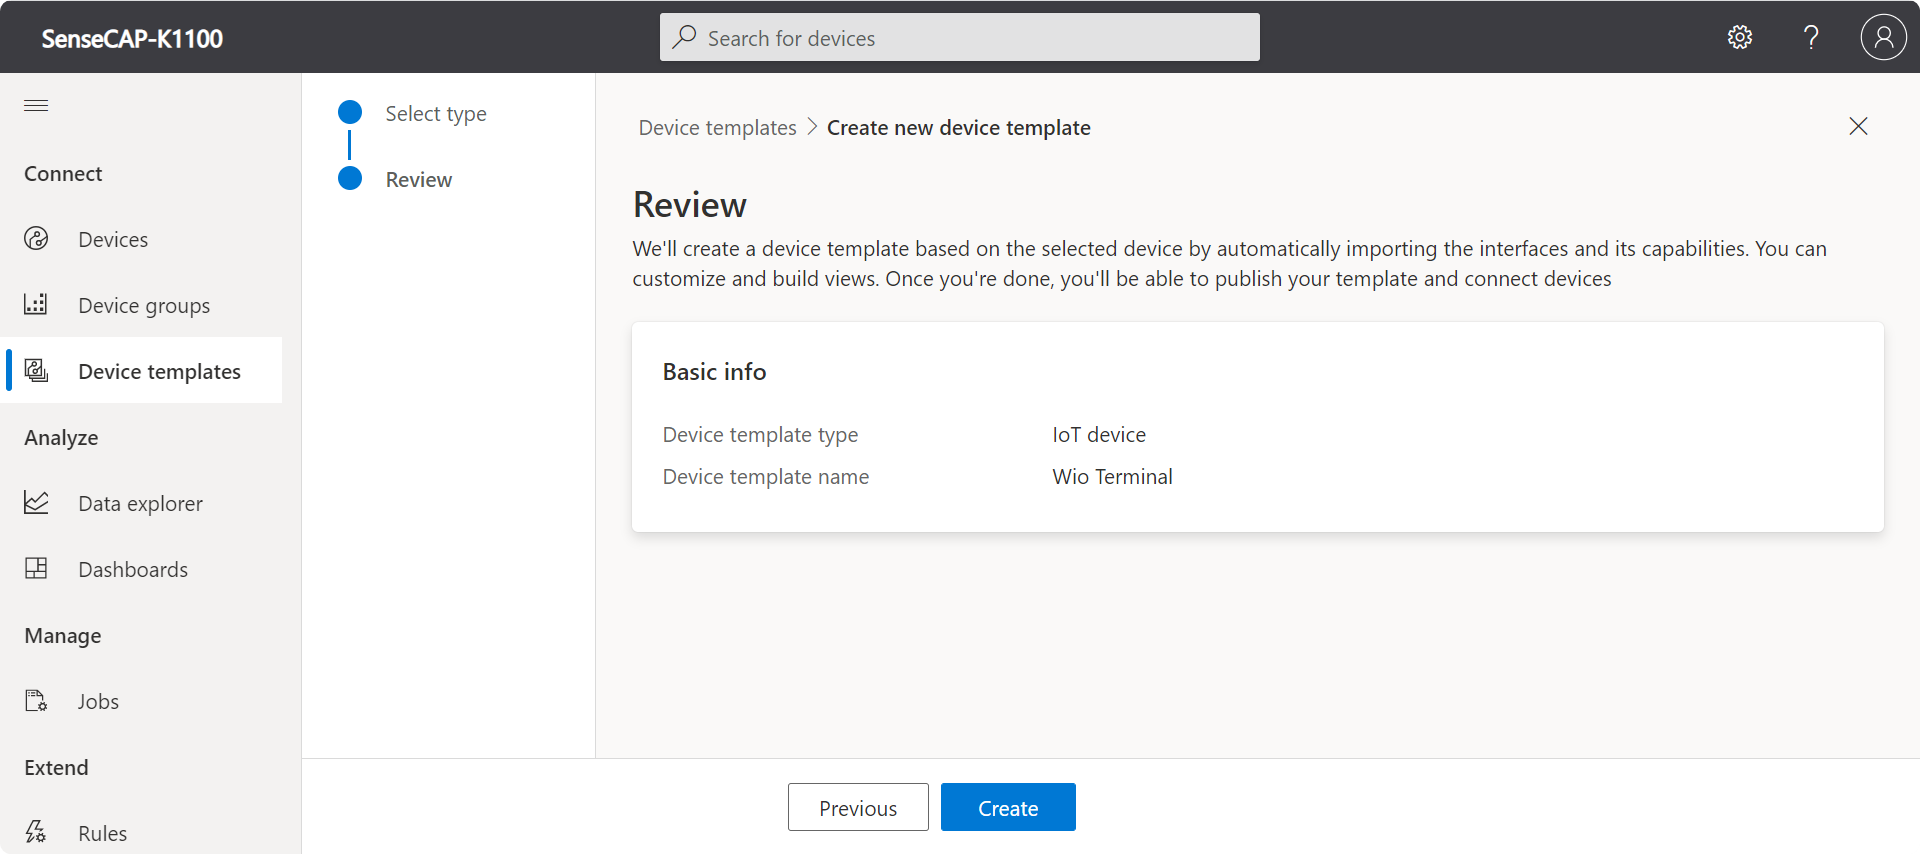
Then, a ready-made template is created.
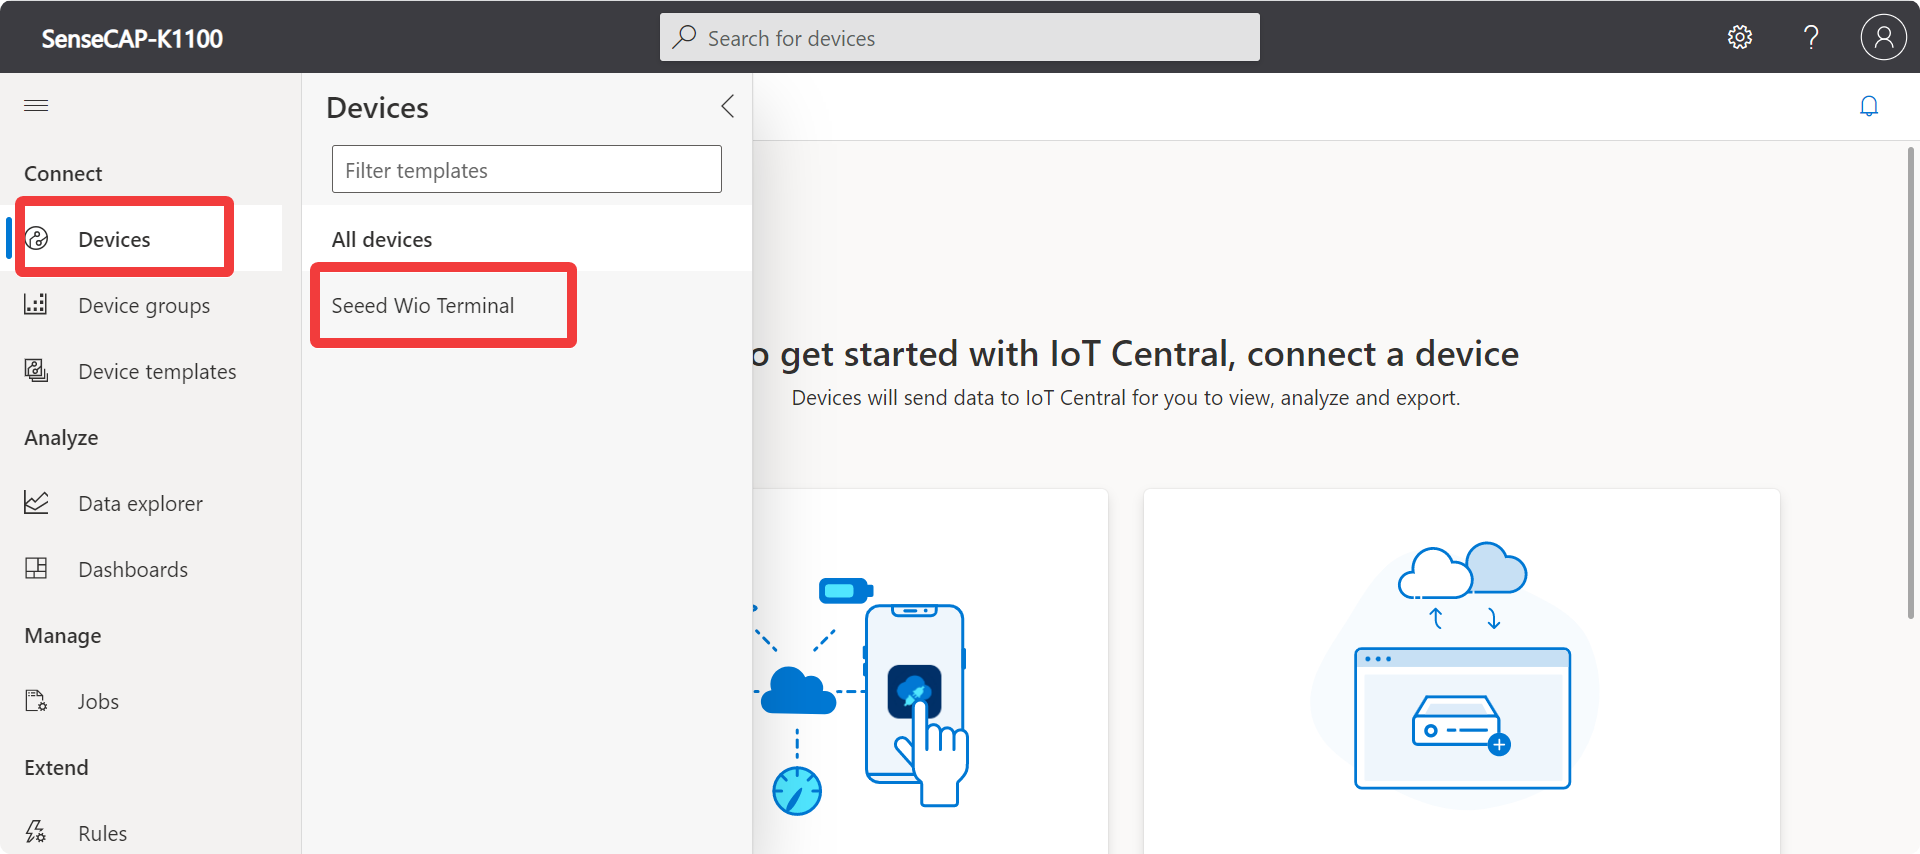
Step 5. Create a Device
Click on Devices -> Seeed Wio Terminal under the left menu bar.
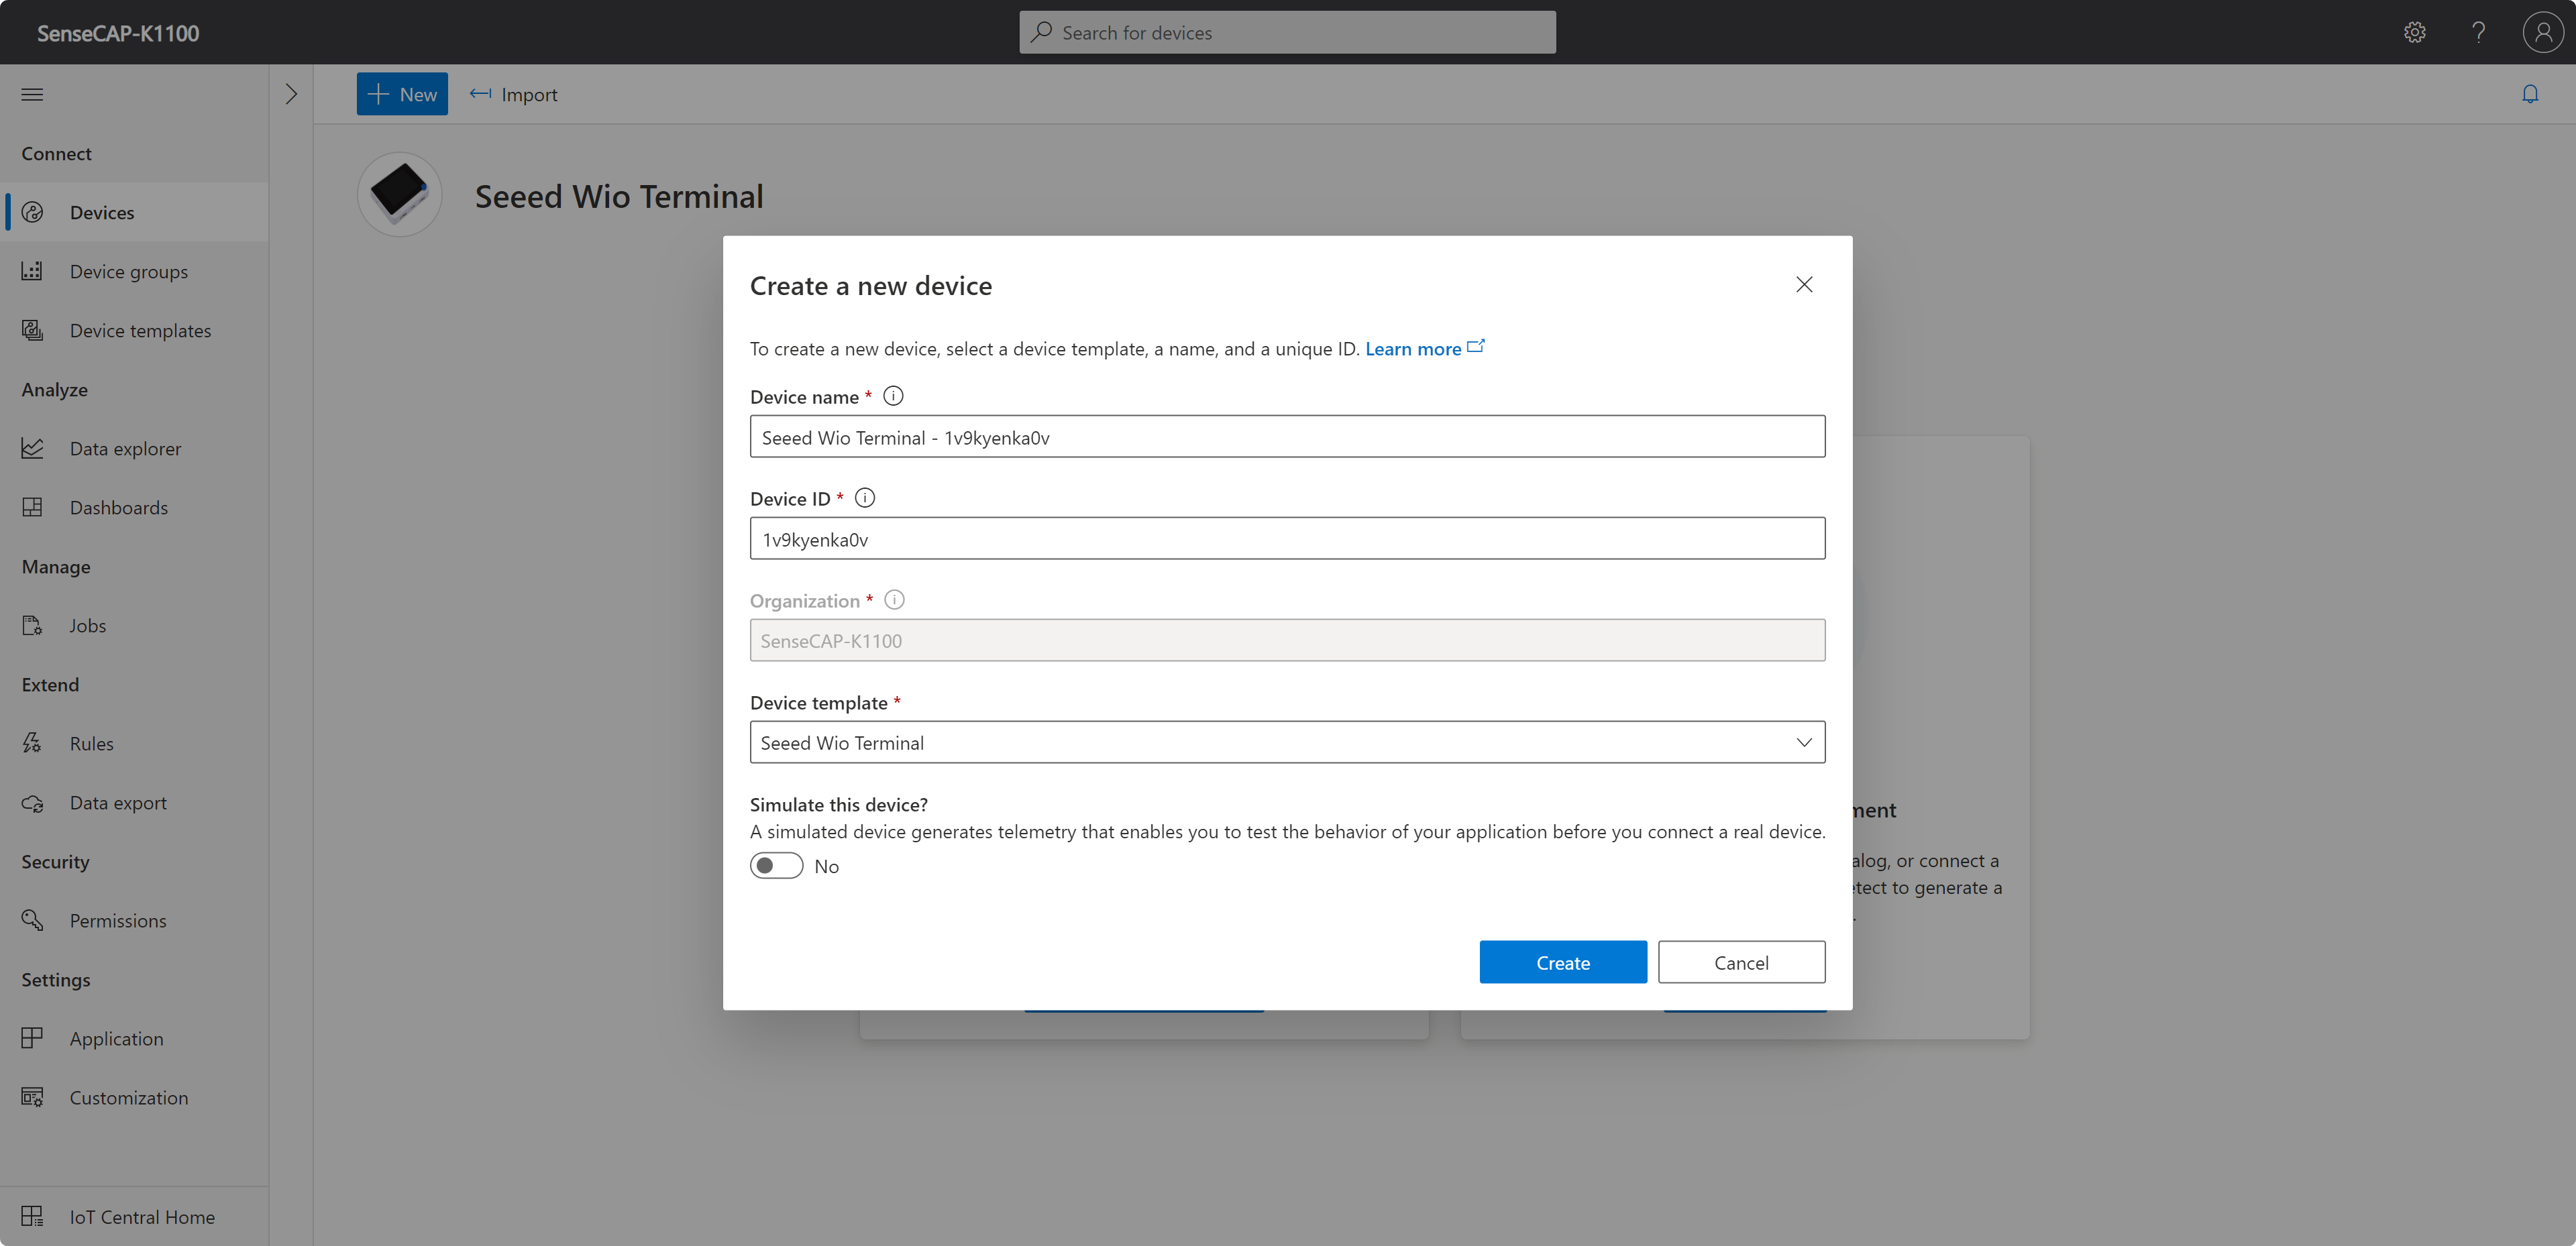
Click on New.

Click on the Create button to complete the creation of the device.
Once you have created the device, you will see the device we have just created under Device, please tap into the device and click on the Connect button in the top left corner.
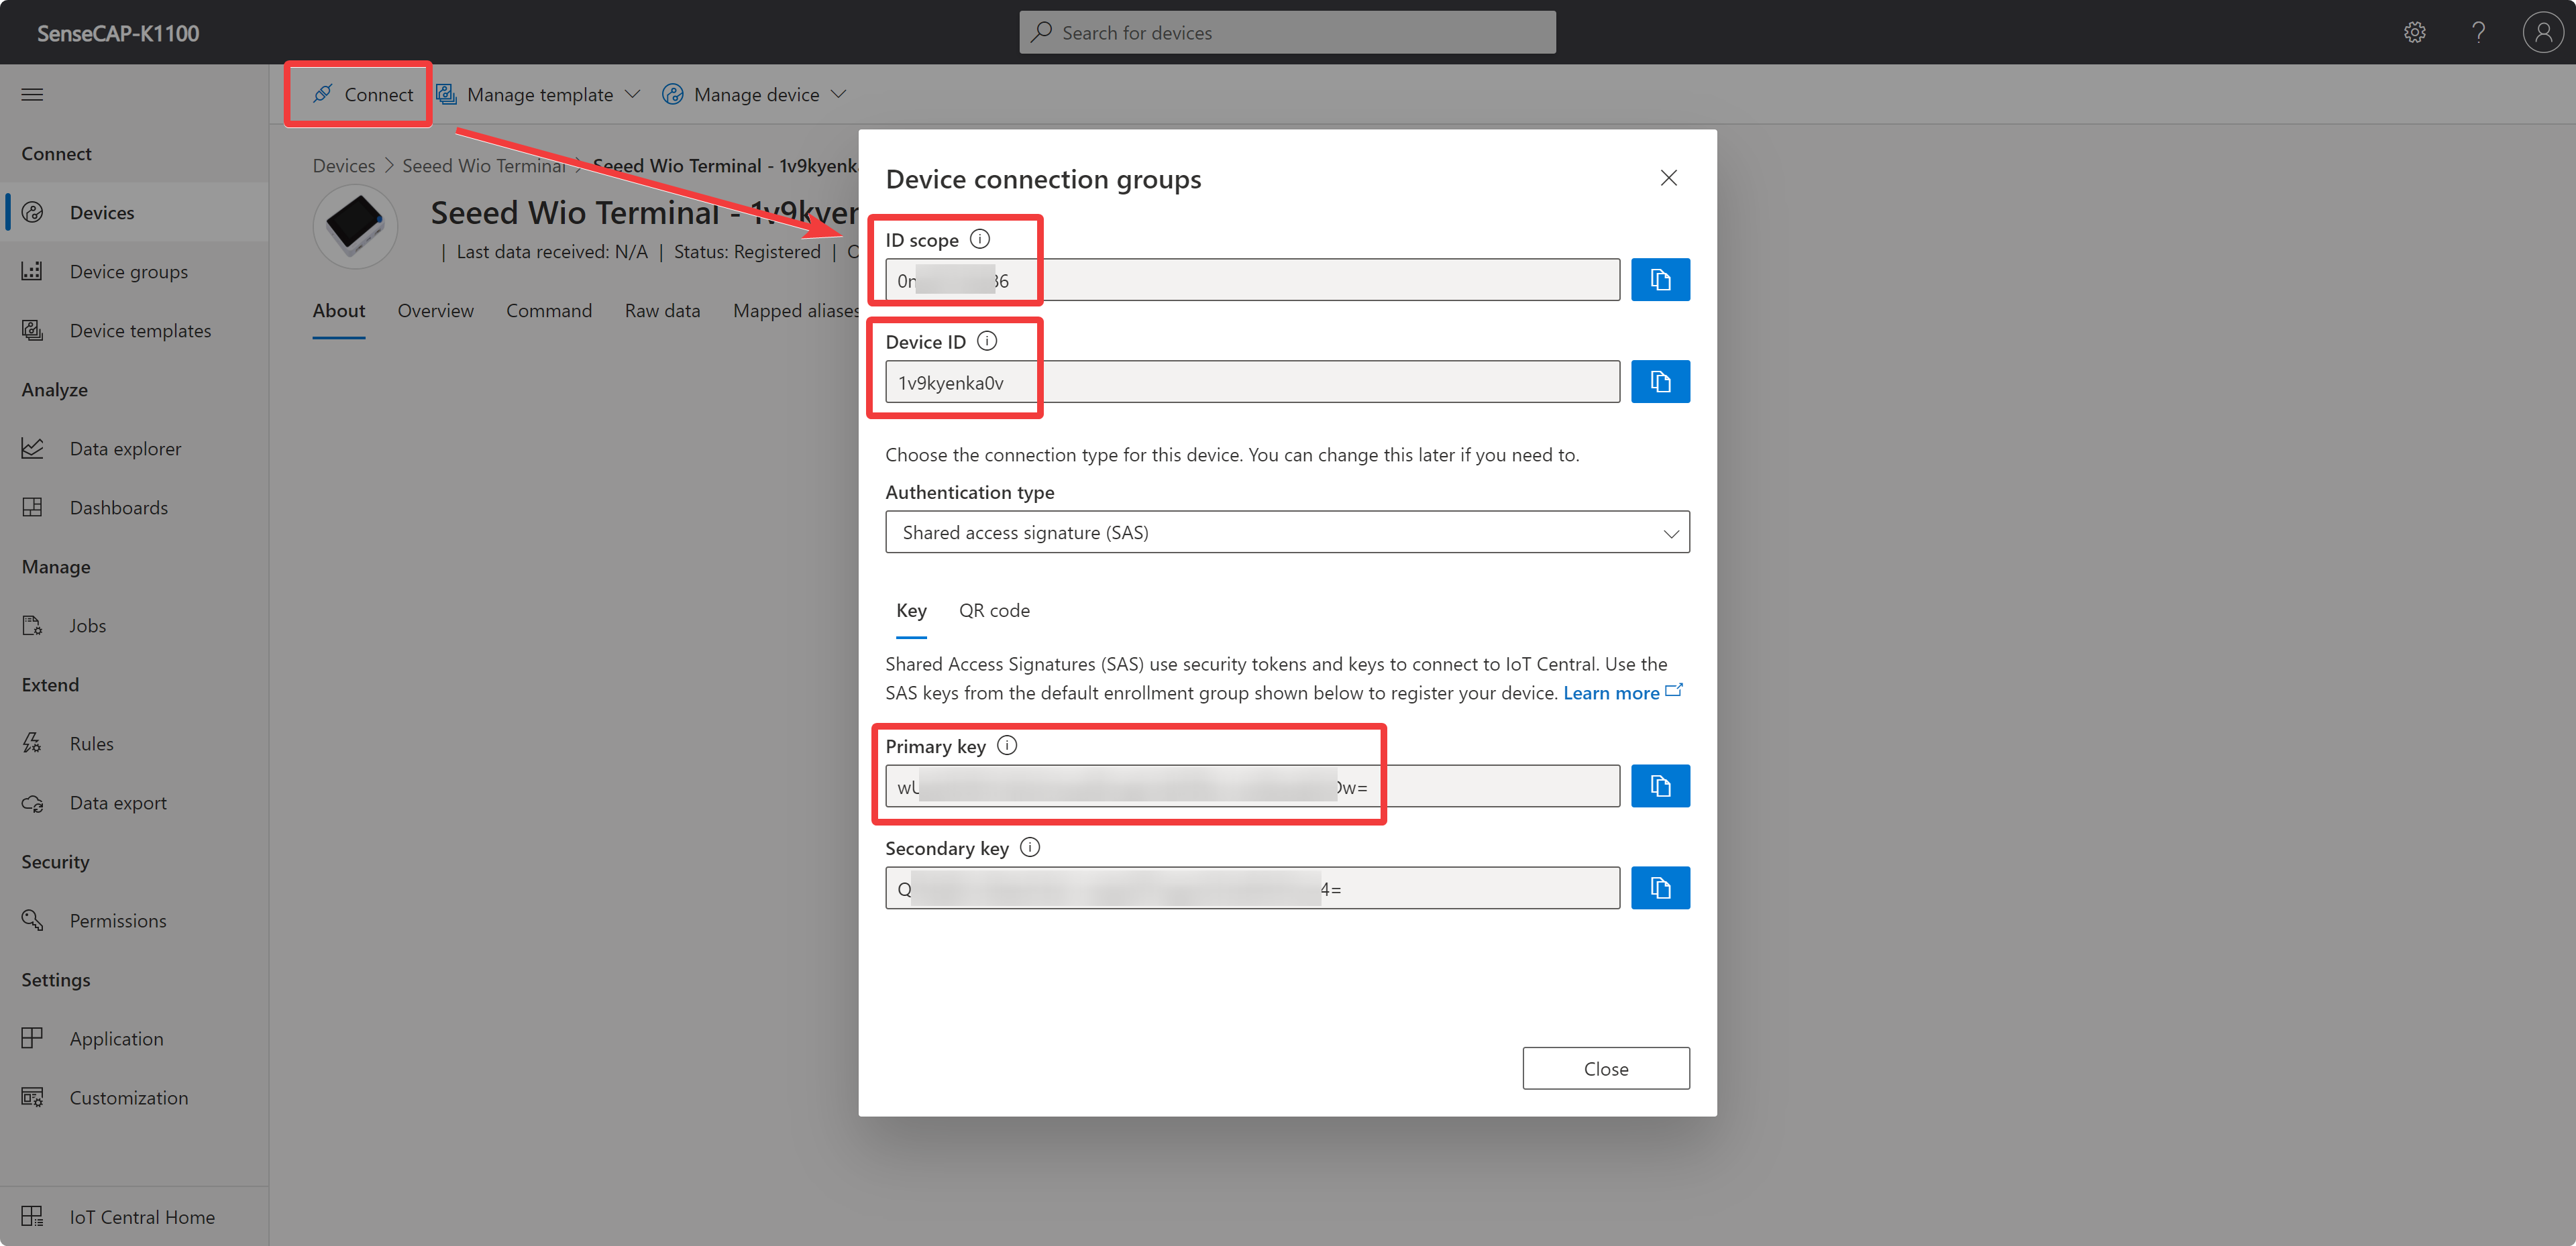
Here we need the information there.
ID scope
Device ID
Primary key
Please make a note of this information, which we will use in the next steps.
Set Up Wio Terminal
Step 1. Download the firmware to your computer
Our second firmware release, SenseCraft, will support Azure IoT Central in the easiest way possible.
Under the Latest release, click on SenseCraft-vx.x.uf2 to download the .uf2 file.
Step 2. Upload the firmware to Wio Terminal
Connect the Wio Terminal to PC and turn in ON, Enter Bootloader Mode by sliding down the power switch further away from "ON" position, release, slide again and release.
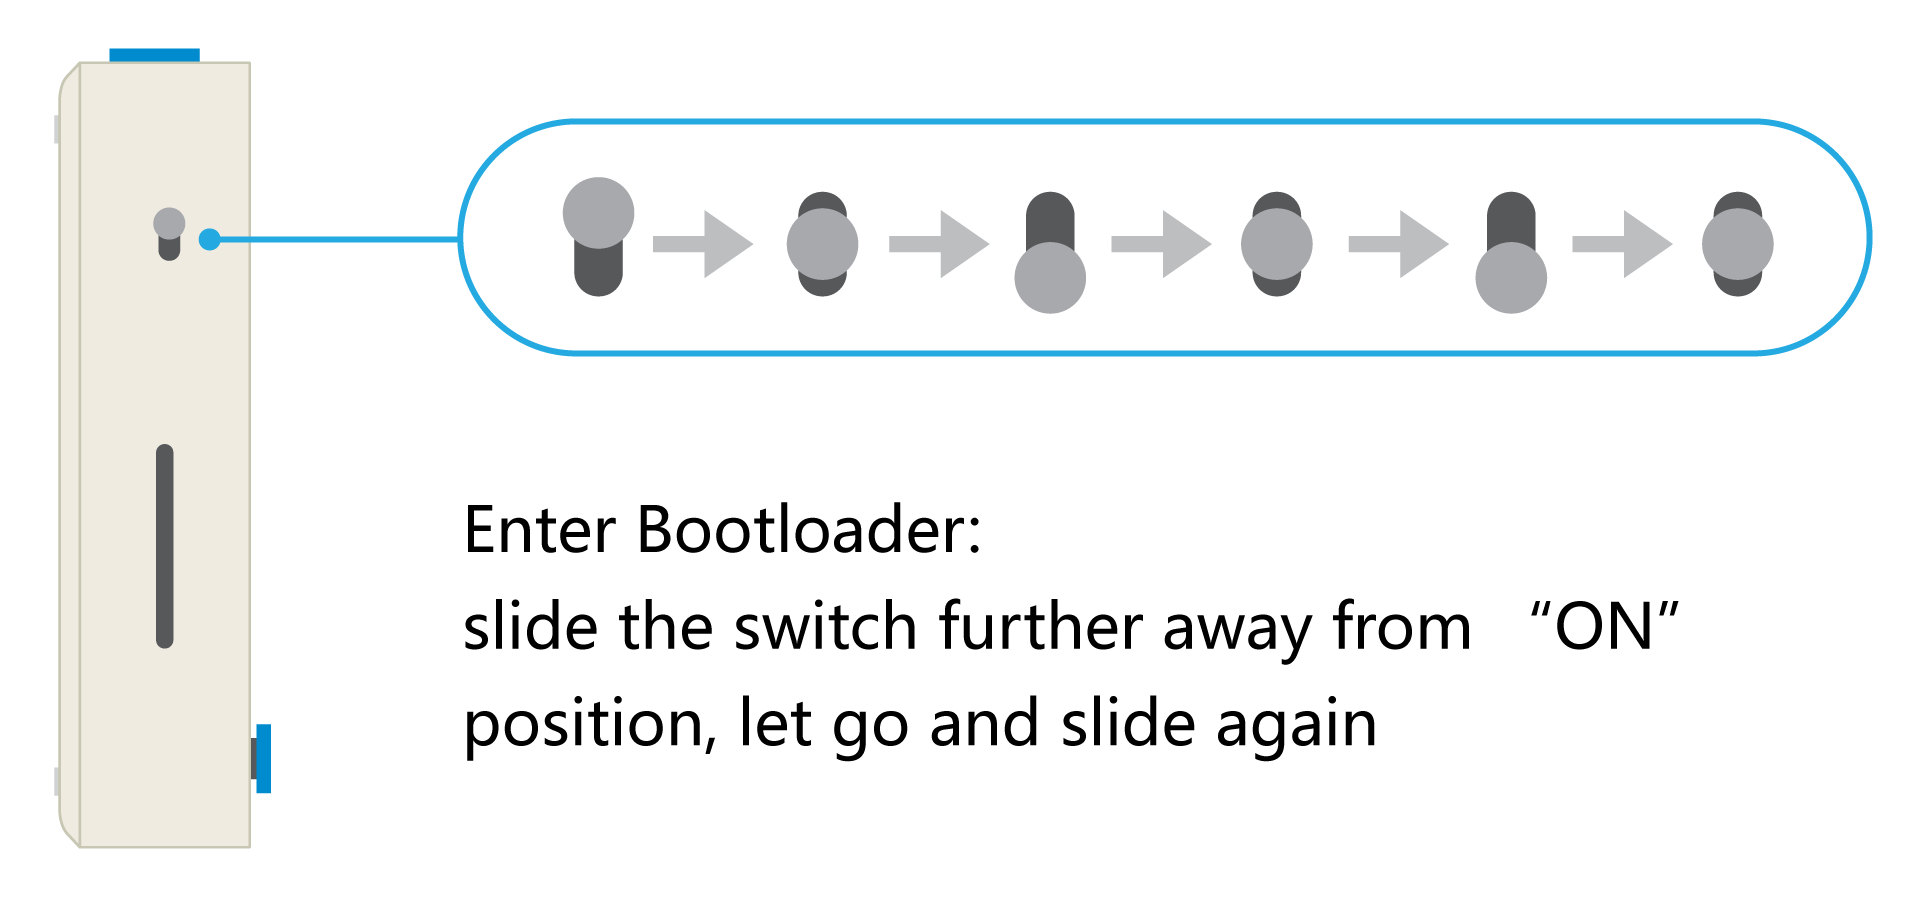
!!!Note Once Wio Terminal is in the Bootloader mode, the blue LED will start to breathe in a way that is different from blinking.
Open File Explorer on your PC and you will see a new external drive, named Arduino, drag the previously downloaded .uf2 file into this Arduino drive.
Now we have successfully uploaded the firmware into the Wio Terminal.
Step 3. Wi-Fi and Azure IoT Configuration
When we use the SenseCraft firmware, a USB stick appears as soon as the Wio Terminal is connected to the computer.
!!!Attention This means that the USB stick appears when the Wio Terminal is connected to the computer, without the need to toggle the side button twice extra!
At this point, there will be a config.txt file inside the USB stick. Please open it with a suitable txt editor and add the required configuration to it.
SSID=WiFi_Name                        // Put your Wifi name here
PASSWORD=WiFi_Password                // Put your wifi password here
ID_SCOPE=Default_ID_Scope             // Put your ID Scope here
DEVICE_ID=Device_ID                   // Put your device ID here
PRIMARY_KEY=Primary_Key               // Put your device Primary key here
Once you have completed the above, please save it. Restart Wio Terminal to take effect.
Display Telemetry Data on Microsoft Azure IoT Central
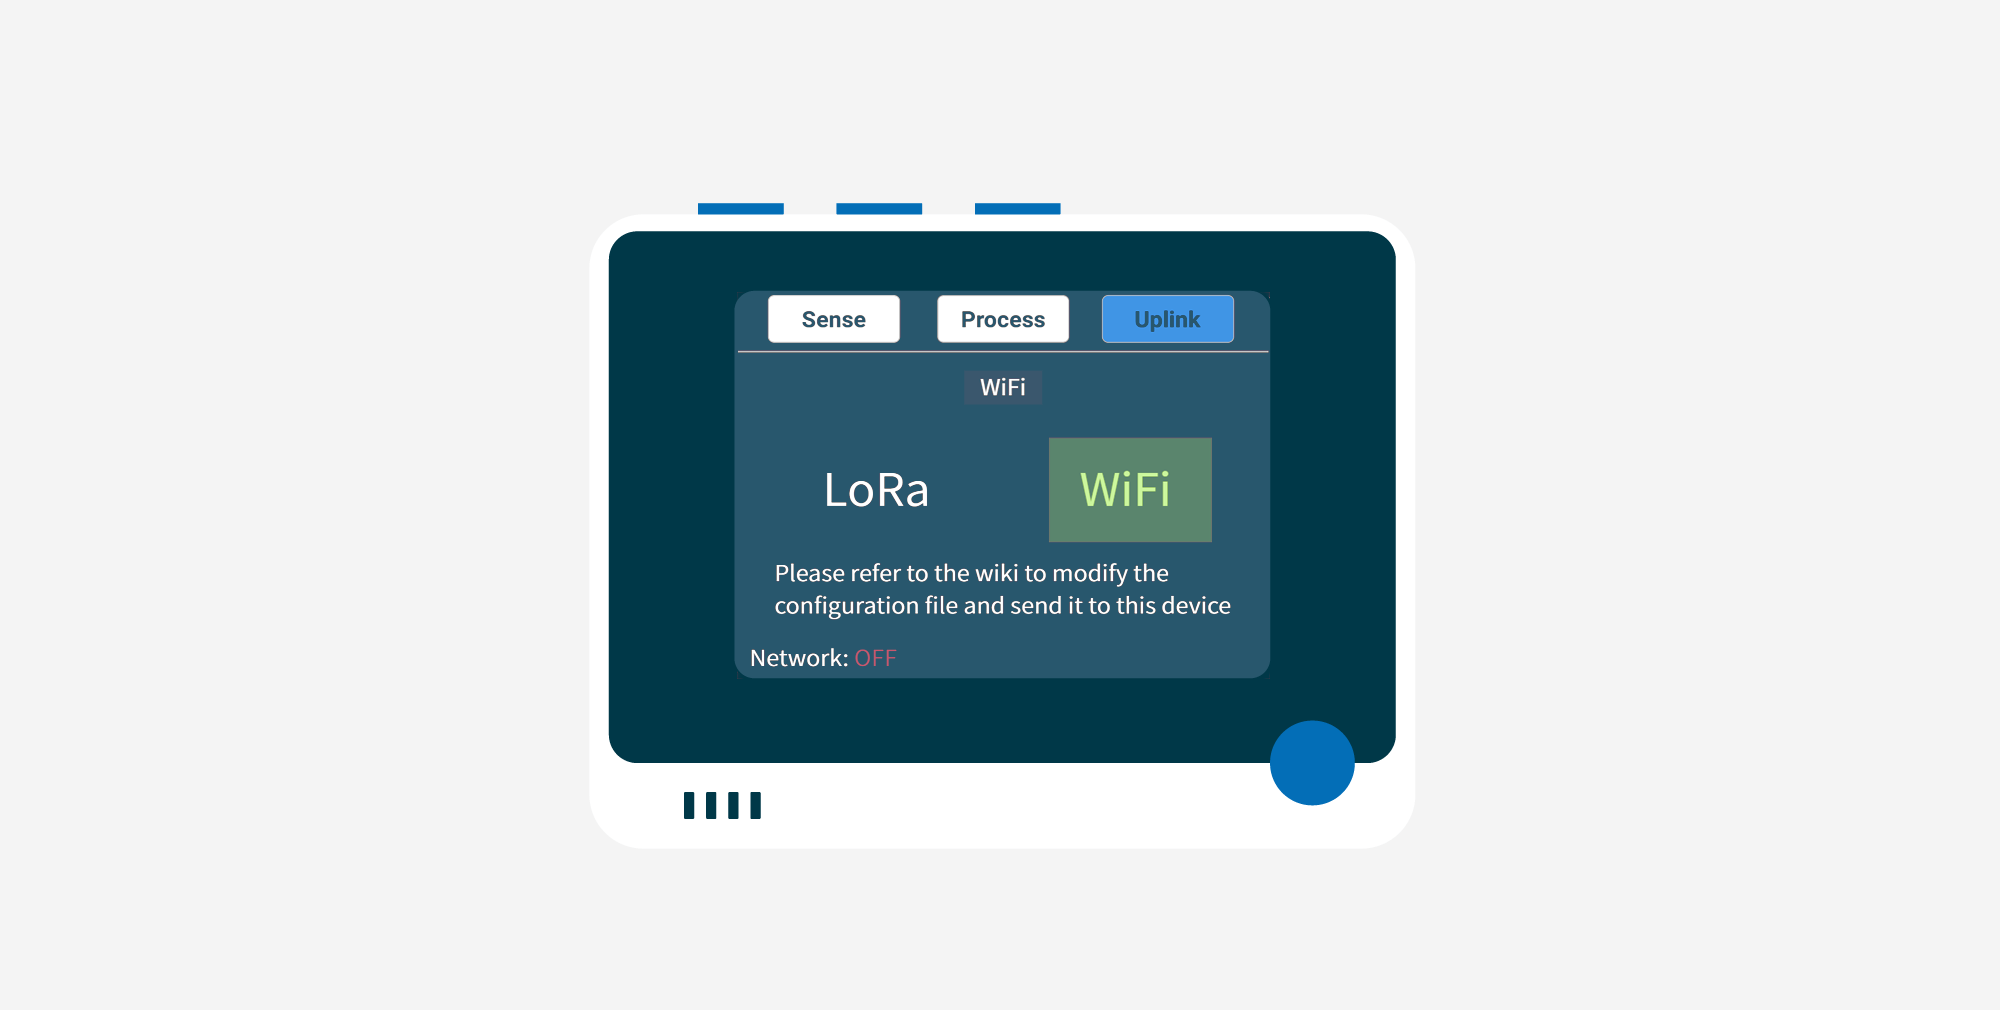
Step 1. Wio Terminal connect to WiFi
Enter Network tab and select WiFi.
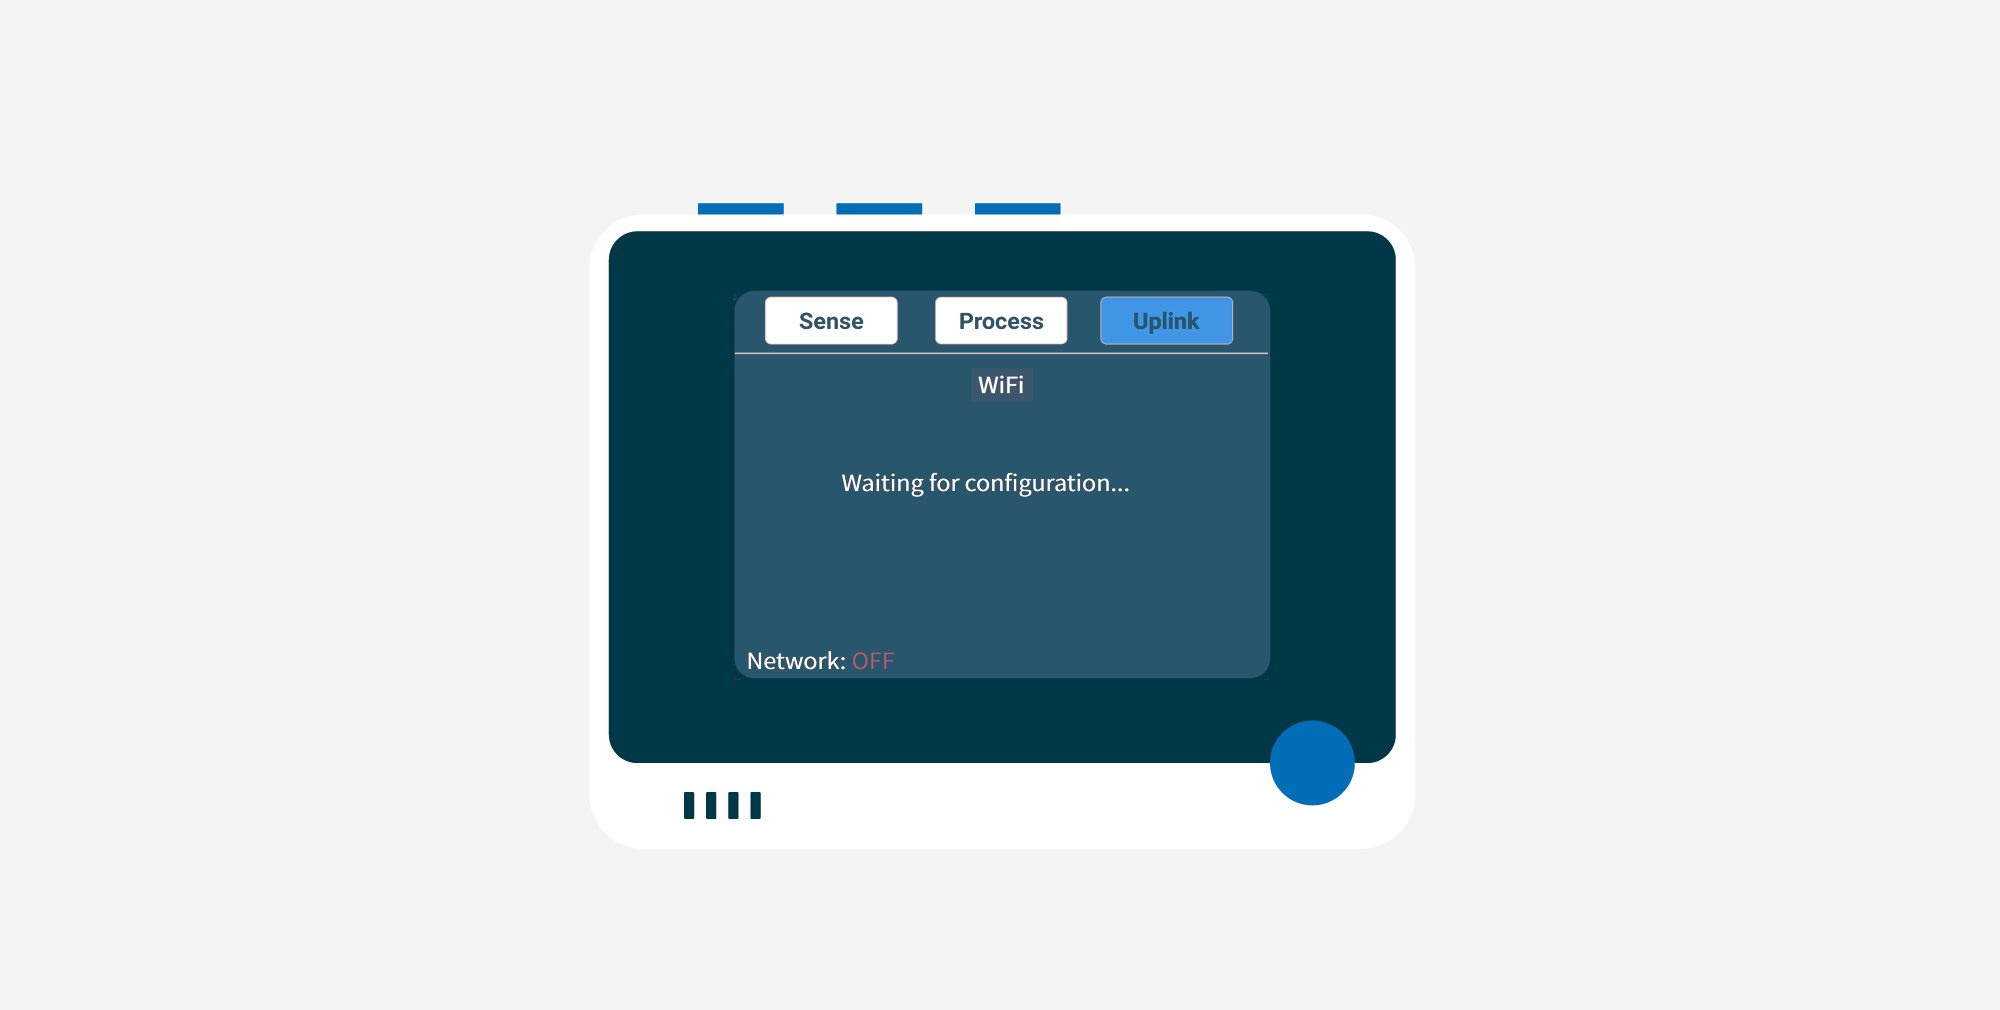
Now it will wait for the configuration to load.
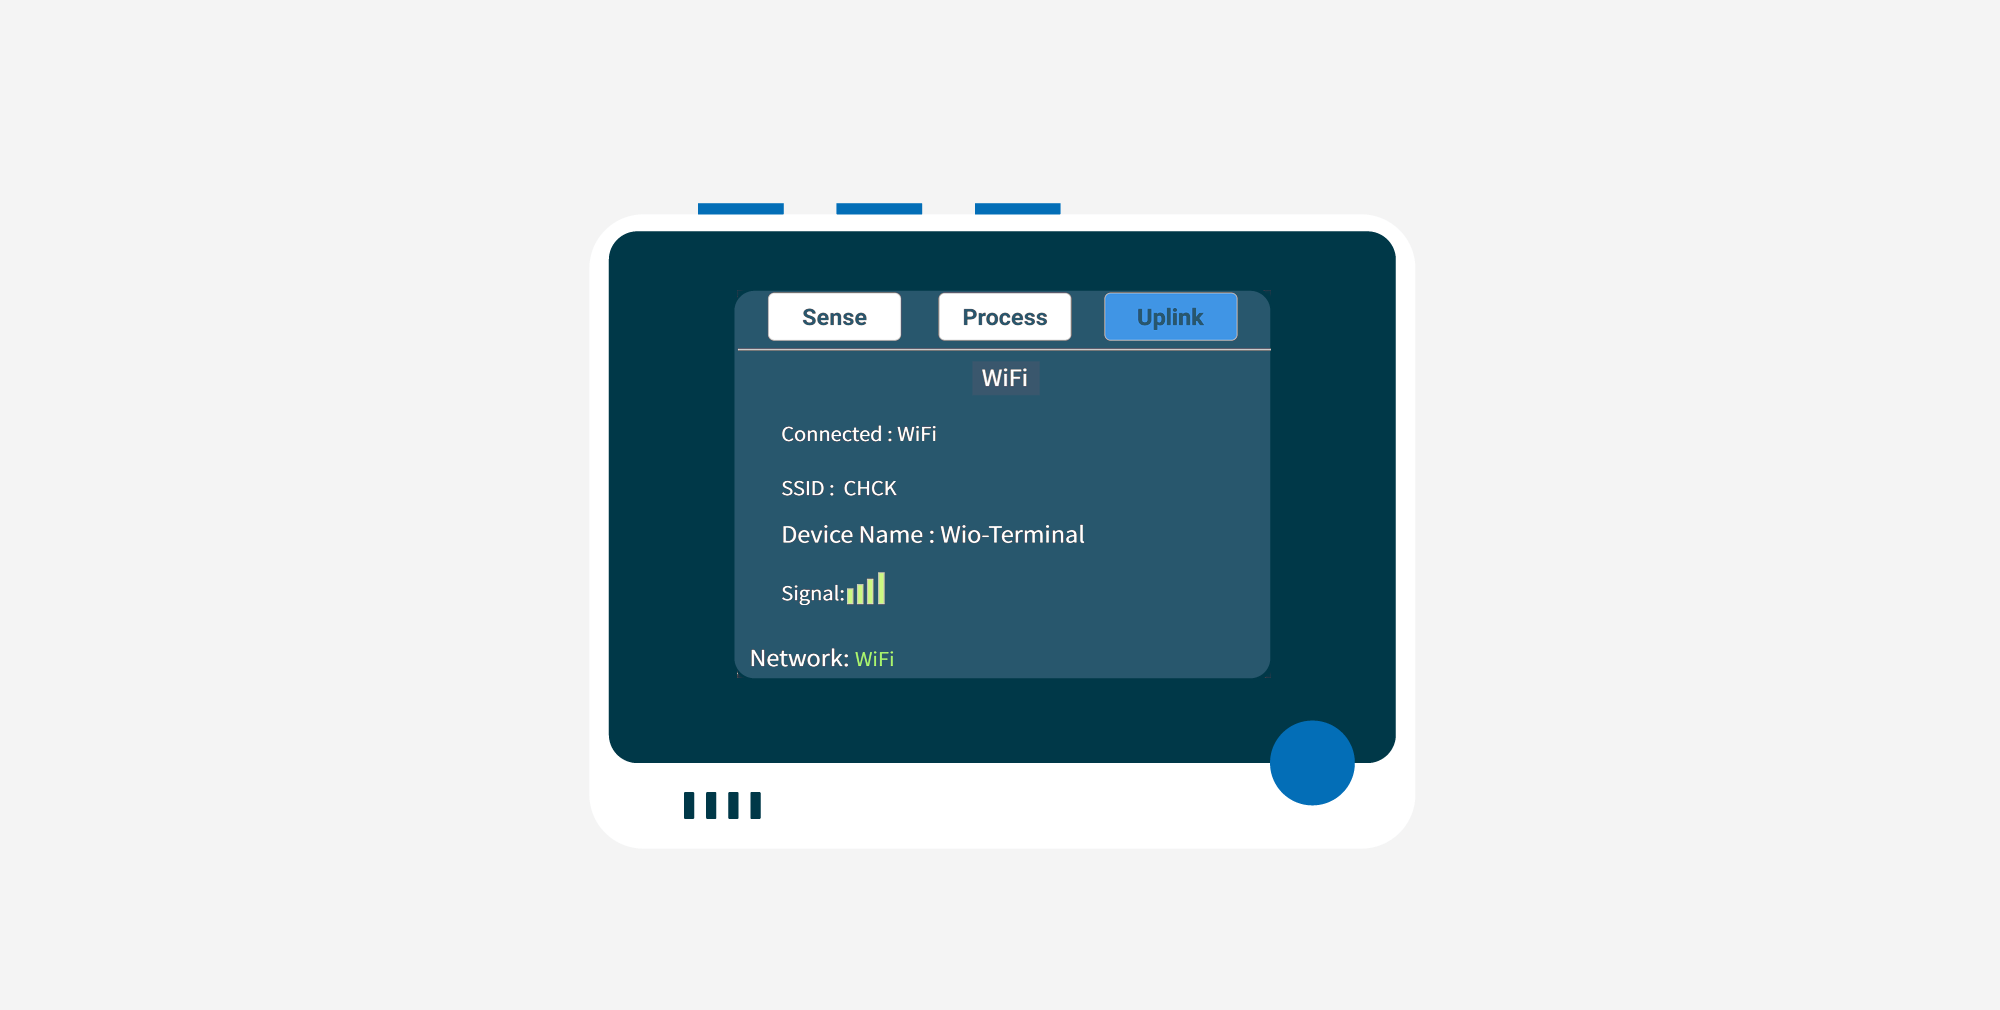
Once the loaded WiFi configuration is picked up, it will first connect with the WiFi network and then with the Azure IoT Central. If the connection with Azure IoT Central is successful, it will display the following.
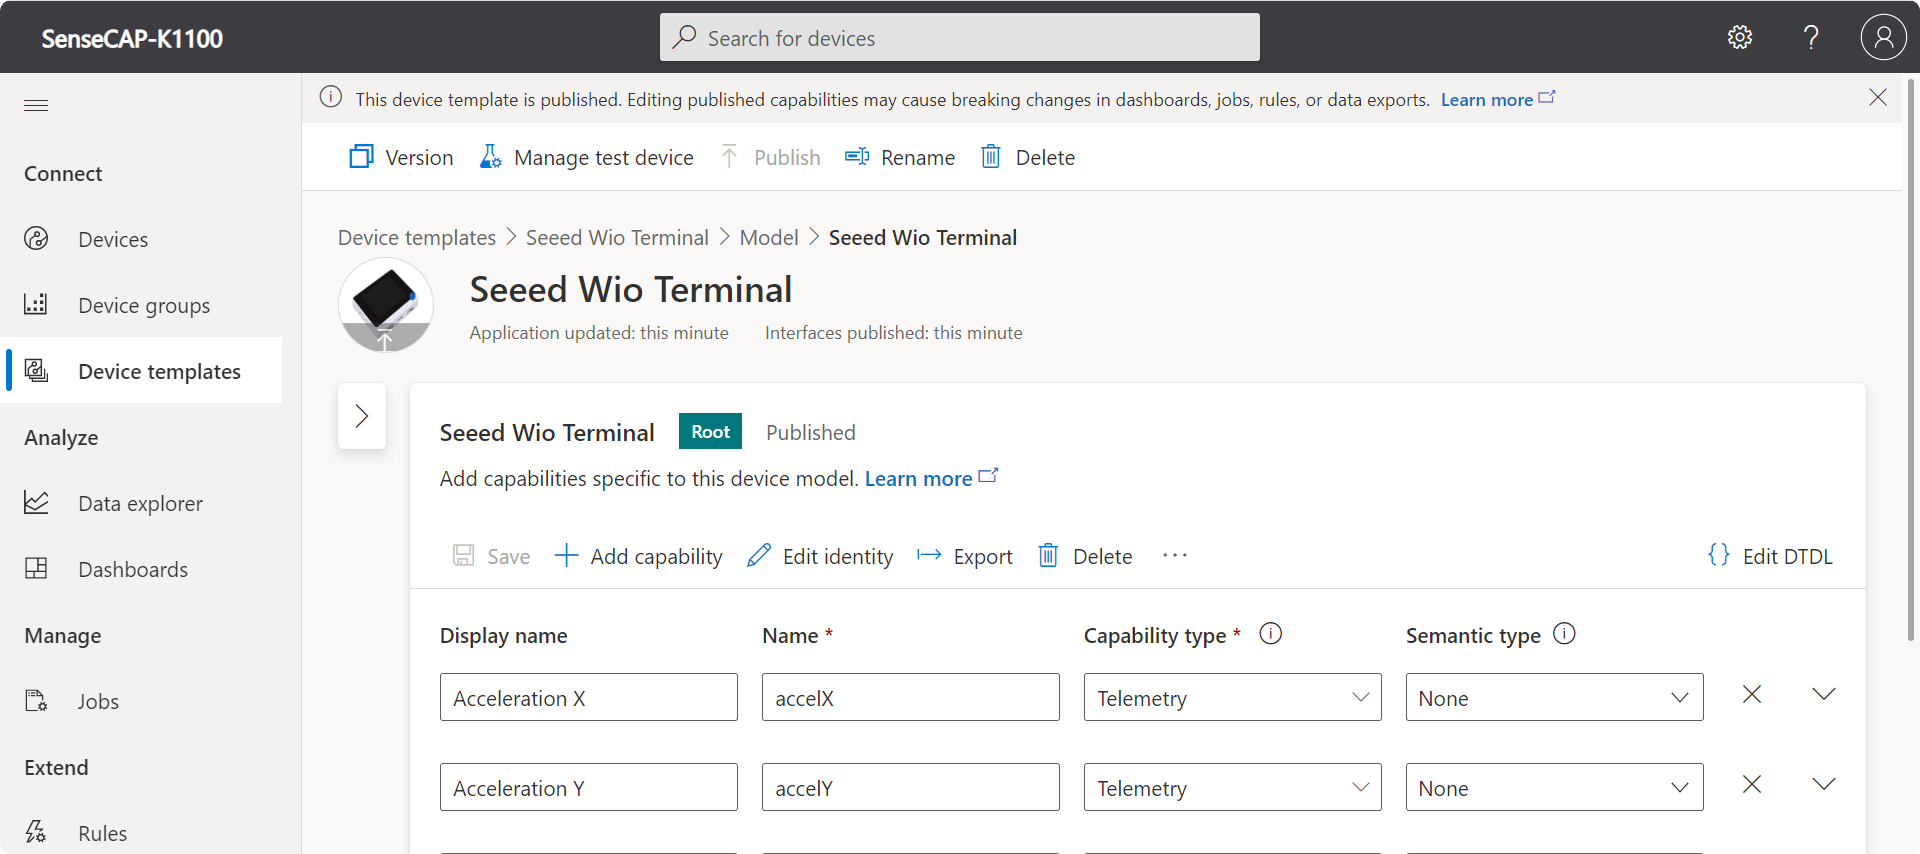
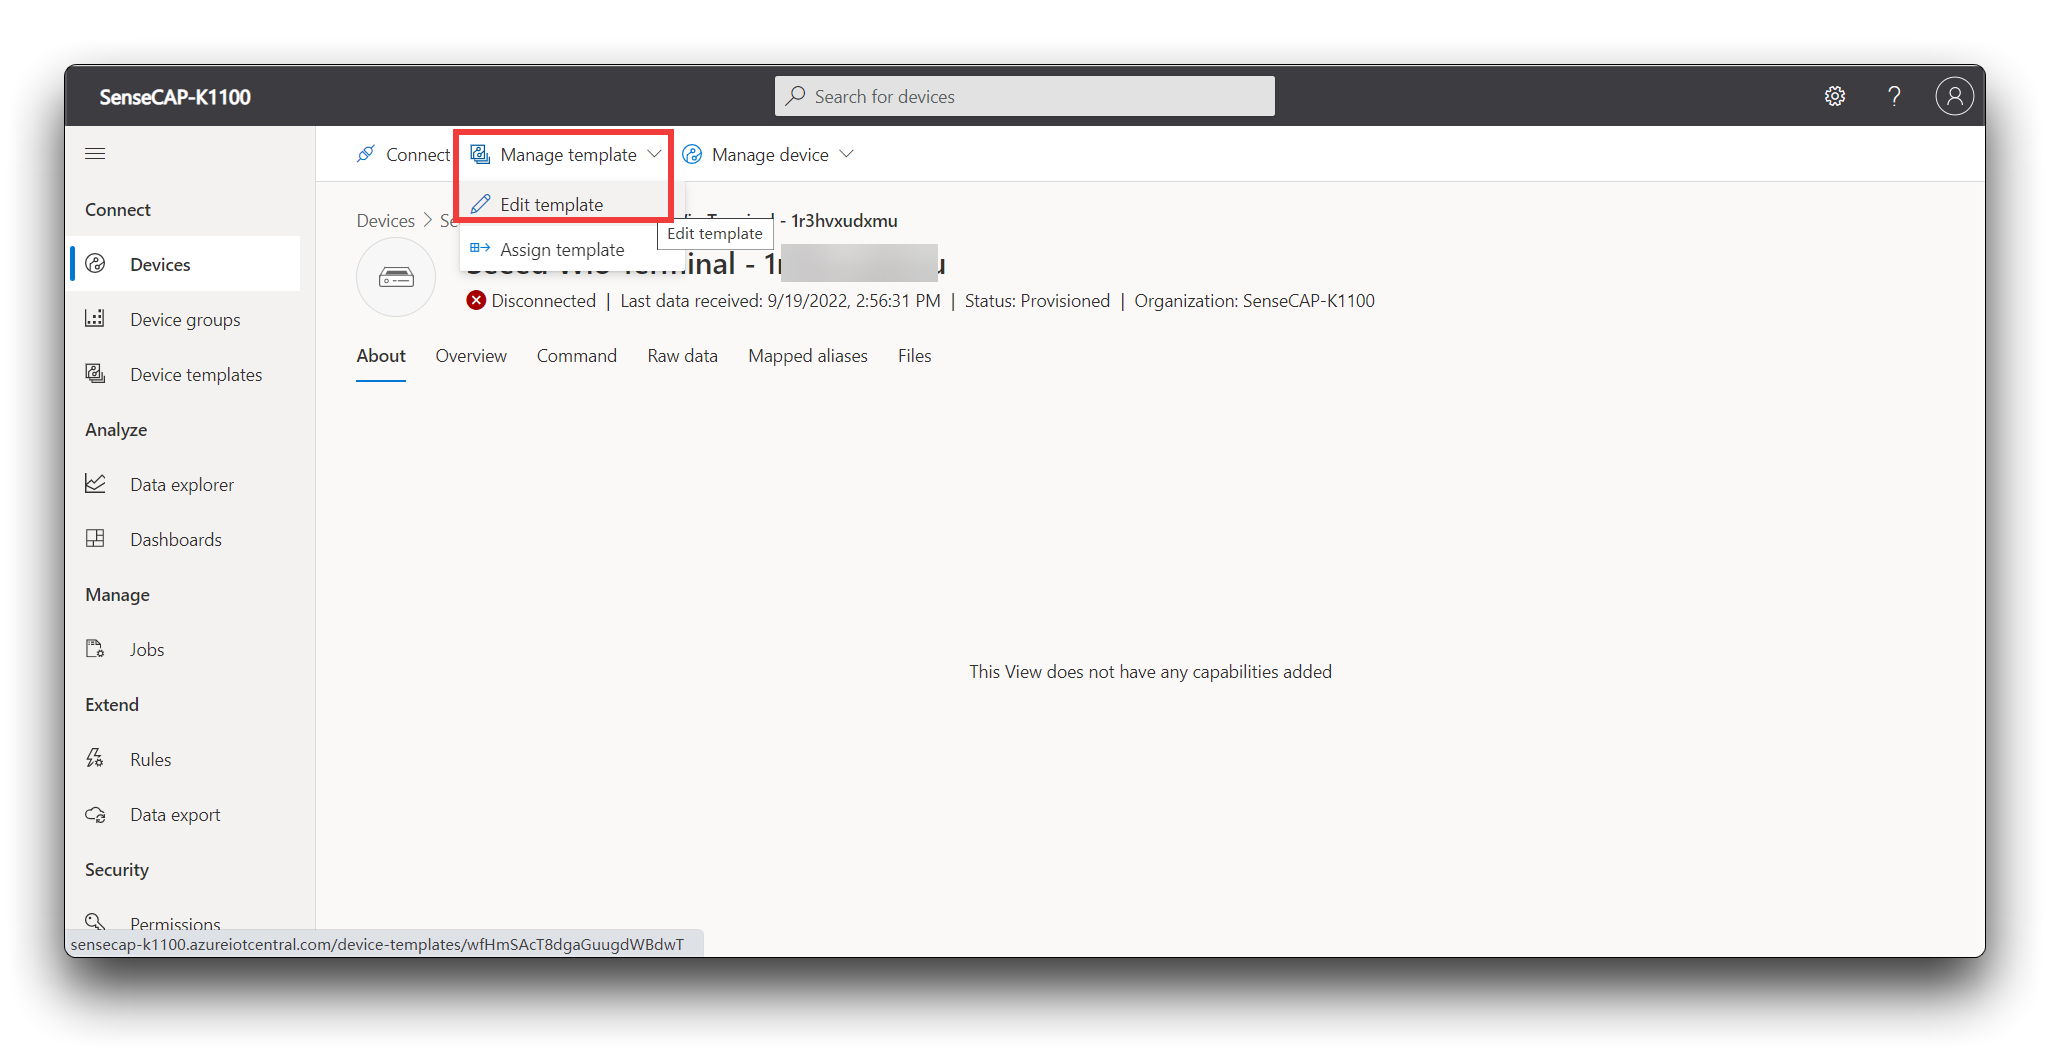
Step 2. Parsing Wio Terminal data
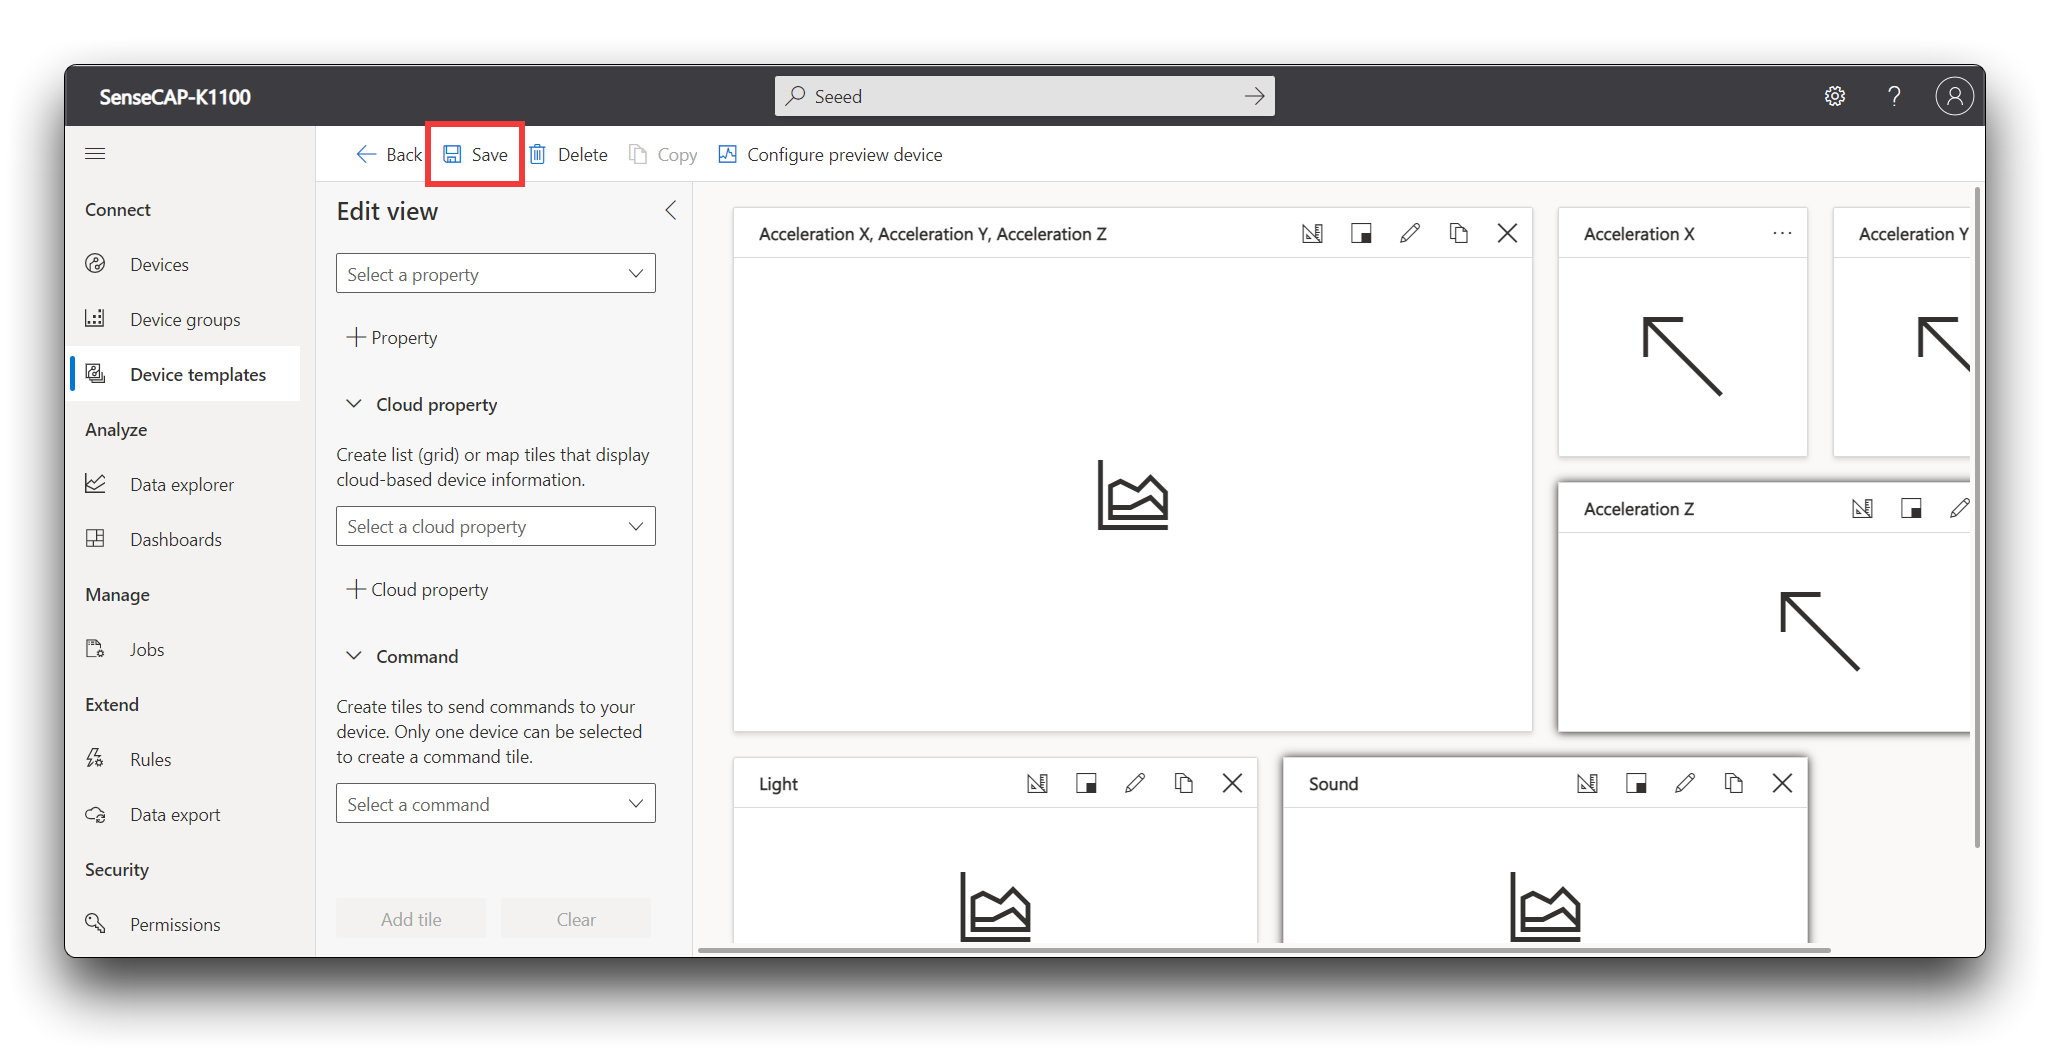
We need to change the template style displayed in the template.
In order to adapt the data type of SenseCraft and achieve a suitable data presentation, here we need to fill in the raw data according to the table below.
| Display name | Name | Capability type | Semantic type |
|---|---|---|---|
| Acceleration X | IMU0 | Telemetry | None |
| Acceleration Y | IMU1 | Telemetry | None |
| Acceleration Z | IMU2 | Telemetry | None |
| Light | Light | Telemetry | None |
| Sound | Sound | Telemetry | None |
| Temperature | Temp_Humi0 | Telemetry | None |
| Humidity | Temp_Humi1 | Telemetry | None |
| CO2 | CO2_VOC0 | Telemetry | None |
| VOC | CO2_VOC1 | Telemetry | None |
| Soil Moisture | Soil | Telemetry | None |
| Vision AI 1 | Vision | Telemetry | None |
| Vision AI 2 | Vision1 | Telemetry | None |
| Vision AI 3 | Vision3 | Telemetry | None |
| Vision AI 4 | Vision4 | Telemetry | None |
| Vision AI 5 | Vision5 | Telemetry | None |
| Vision AI 6 | Vision6 | Telemetry | None |
| Vision AI 7 | Vision7 | Telemetry | None |
| Vision AI 8 | Vision8 | Telemetry | None |
| Vision AI 9 | Vision9 | Telemetry | None |
| Vision AI 10 | Vision10 | Telemetry | None |
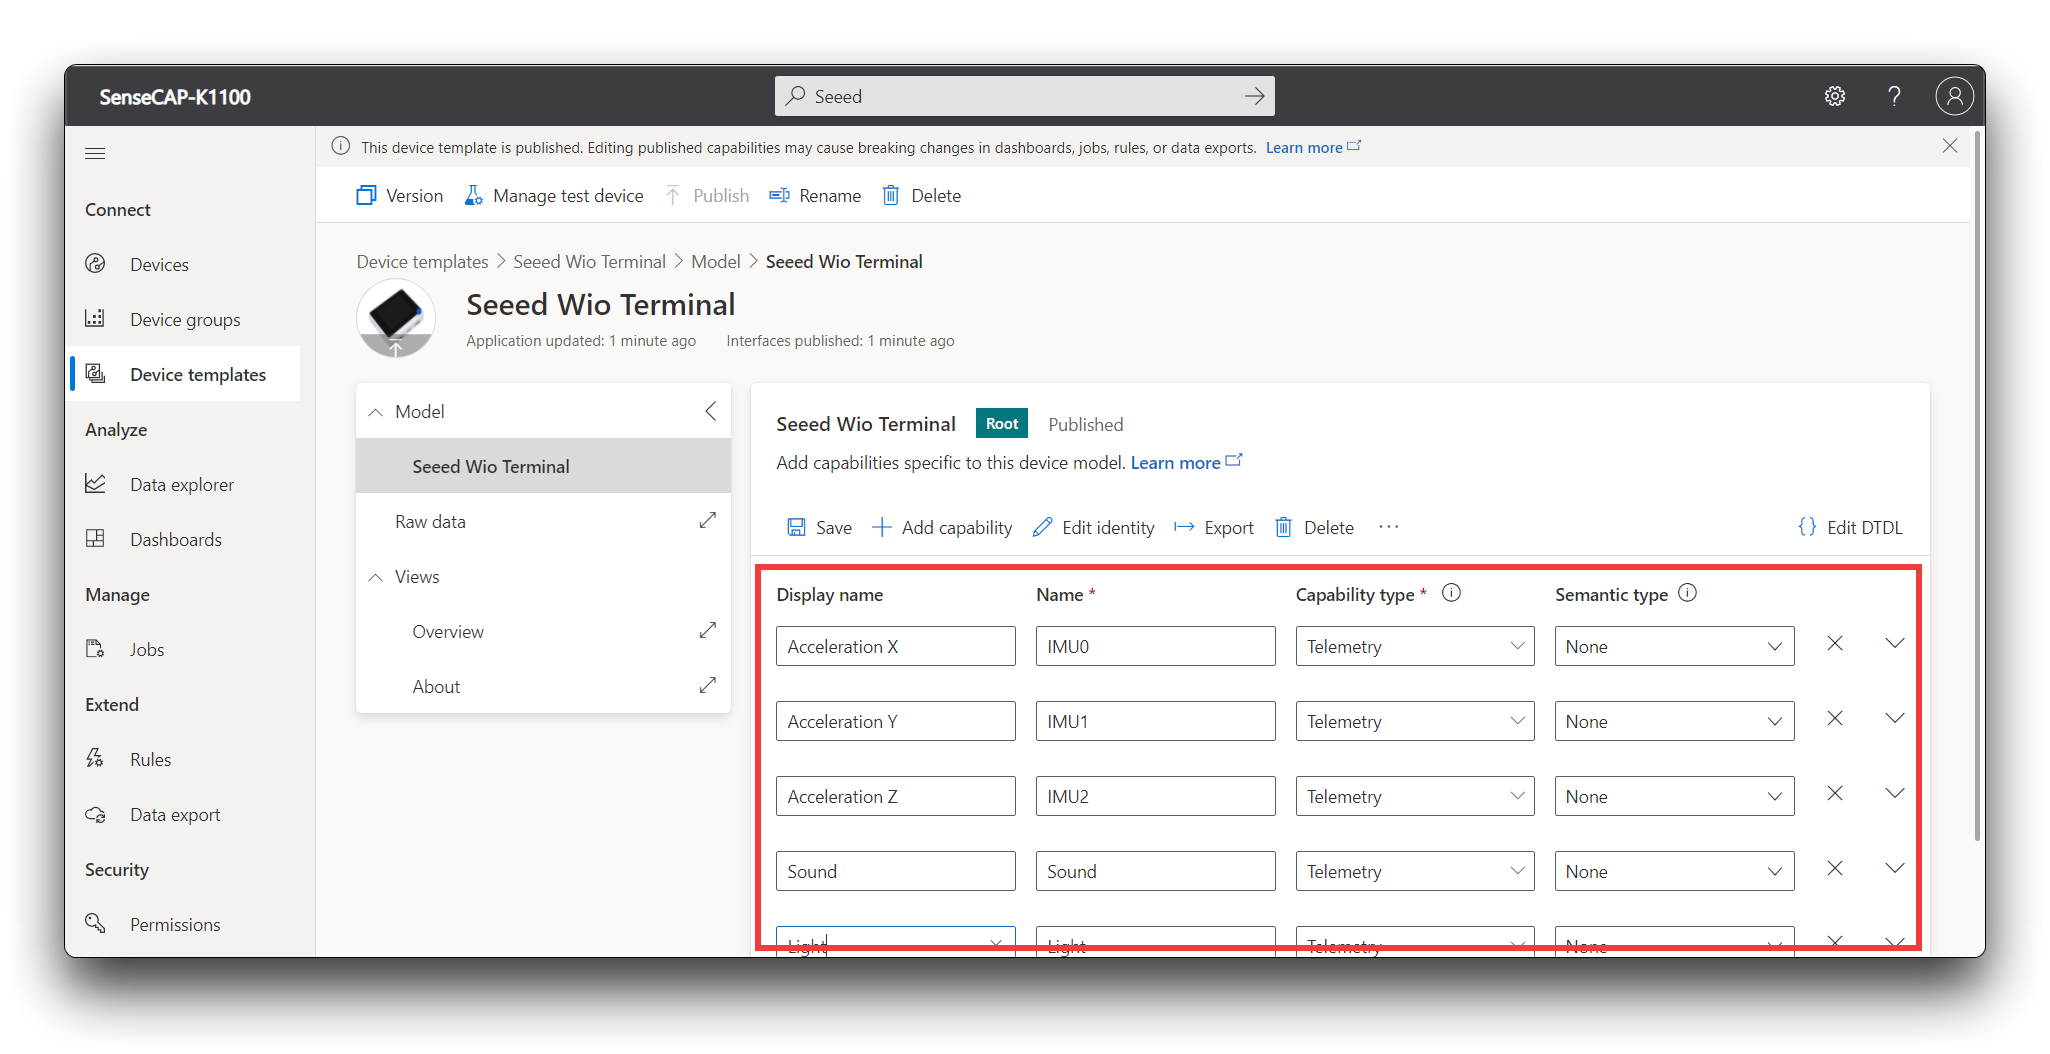
Once you have completed the form, please click the Save button.
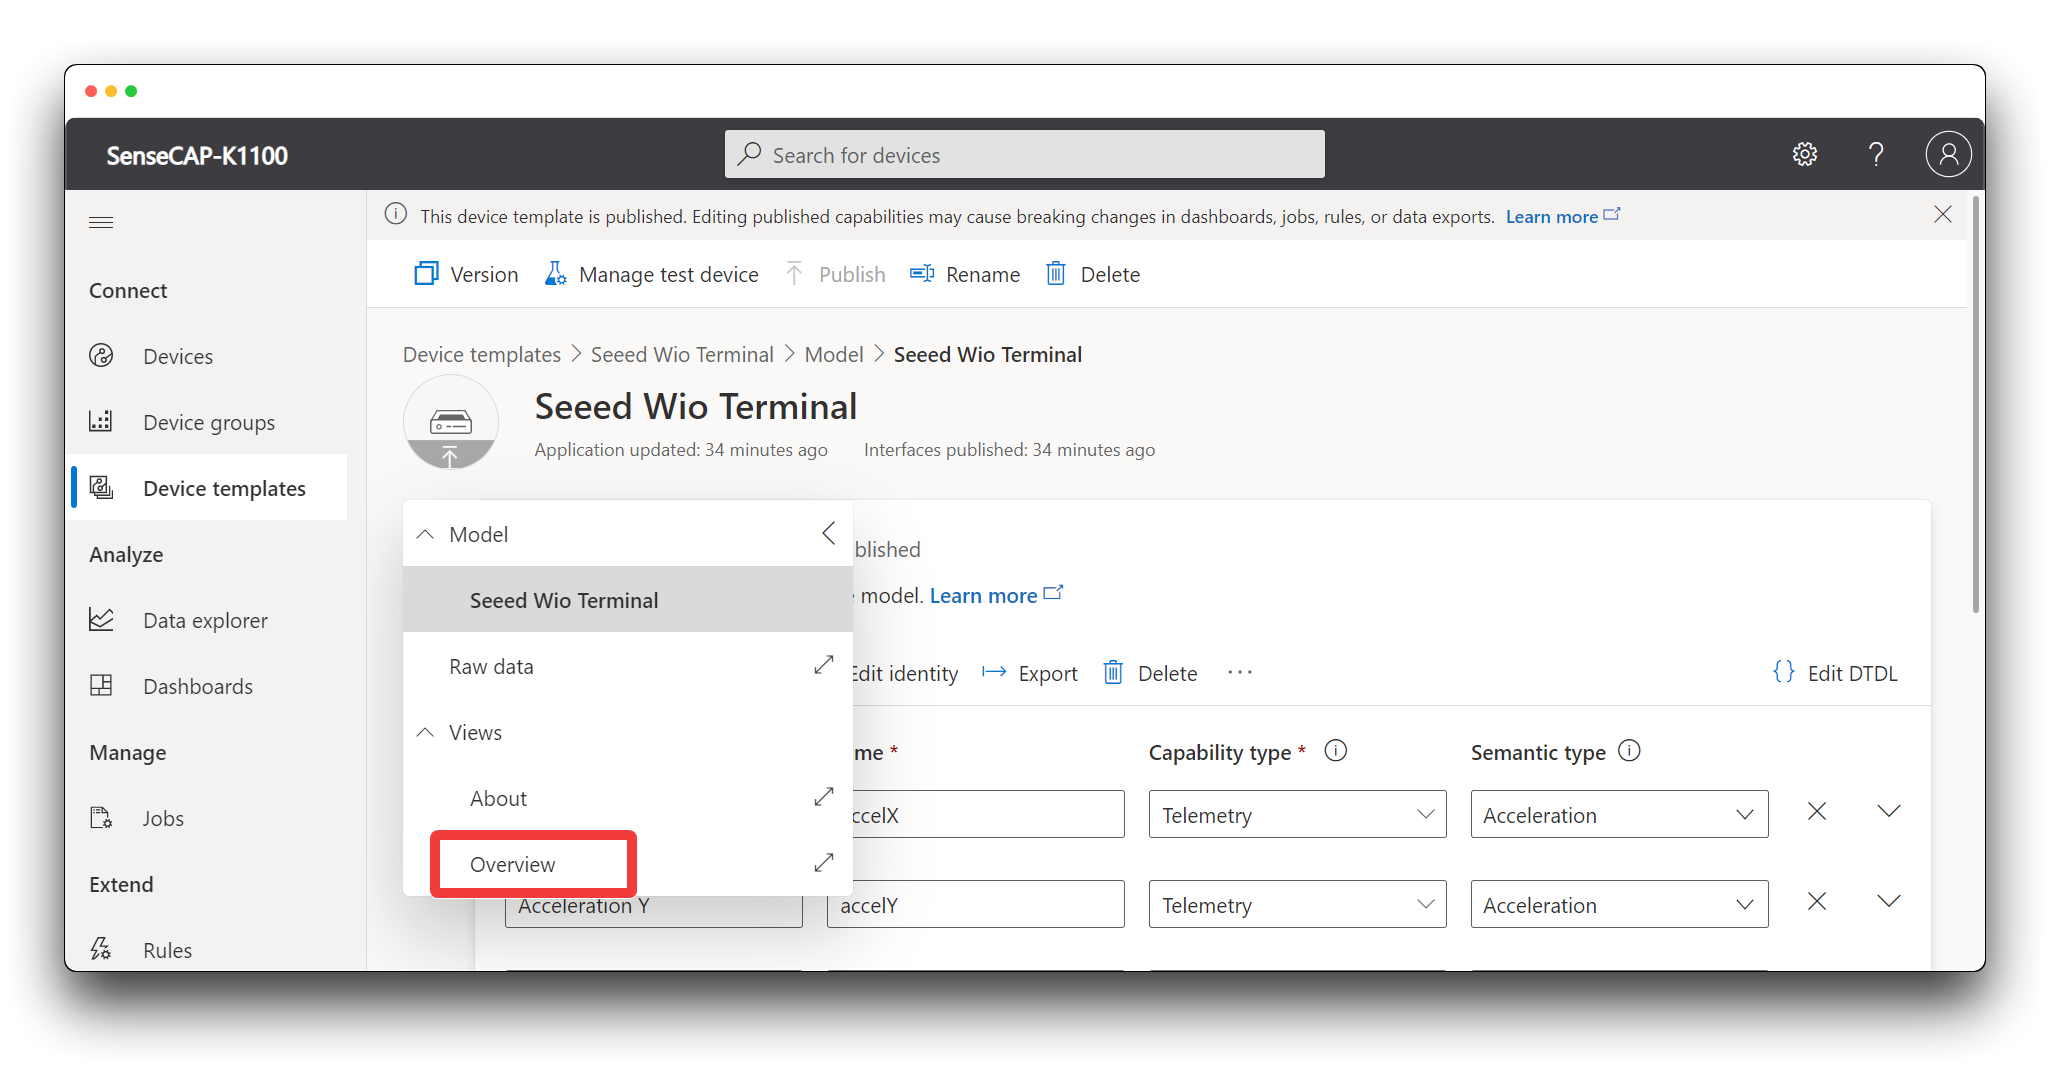
Click on Overview on the left navigation menu.
Collapse select a telemetry drop-down menu and select the telemetry that you want to visualize.
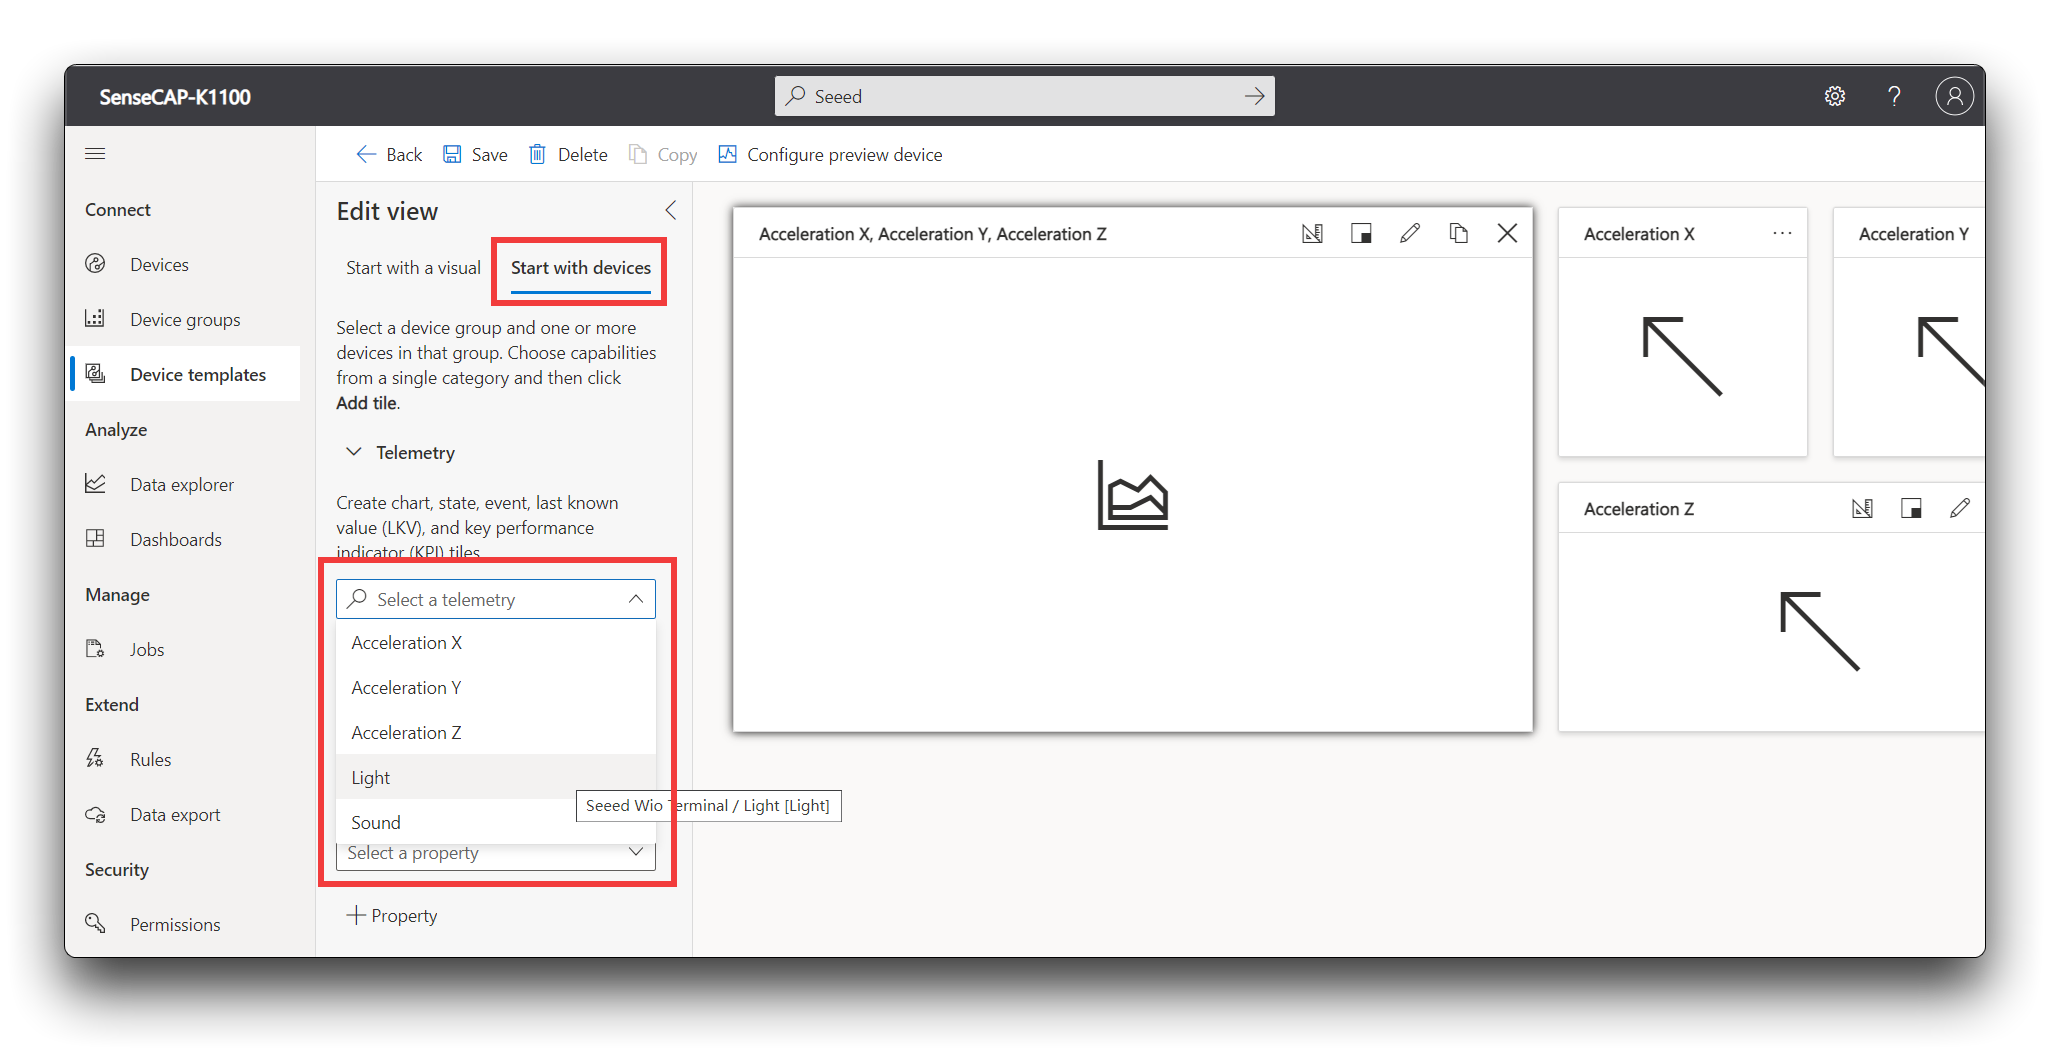
Click Add tile and you will see the tile added into the Azure IoT Central Dashboard.
Note: You can resize or change the visualization of the tiles according to your preference

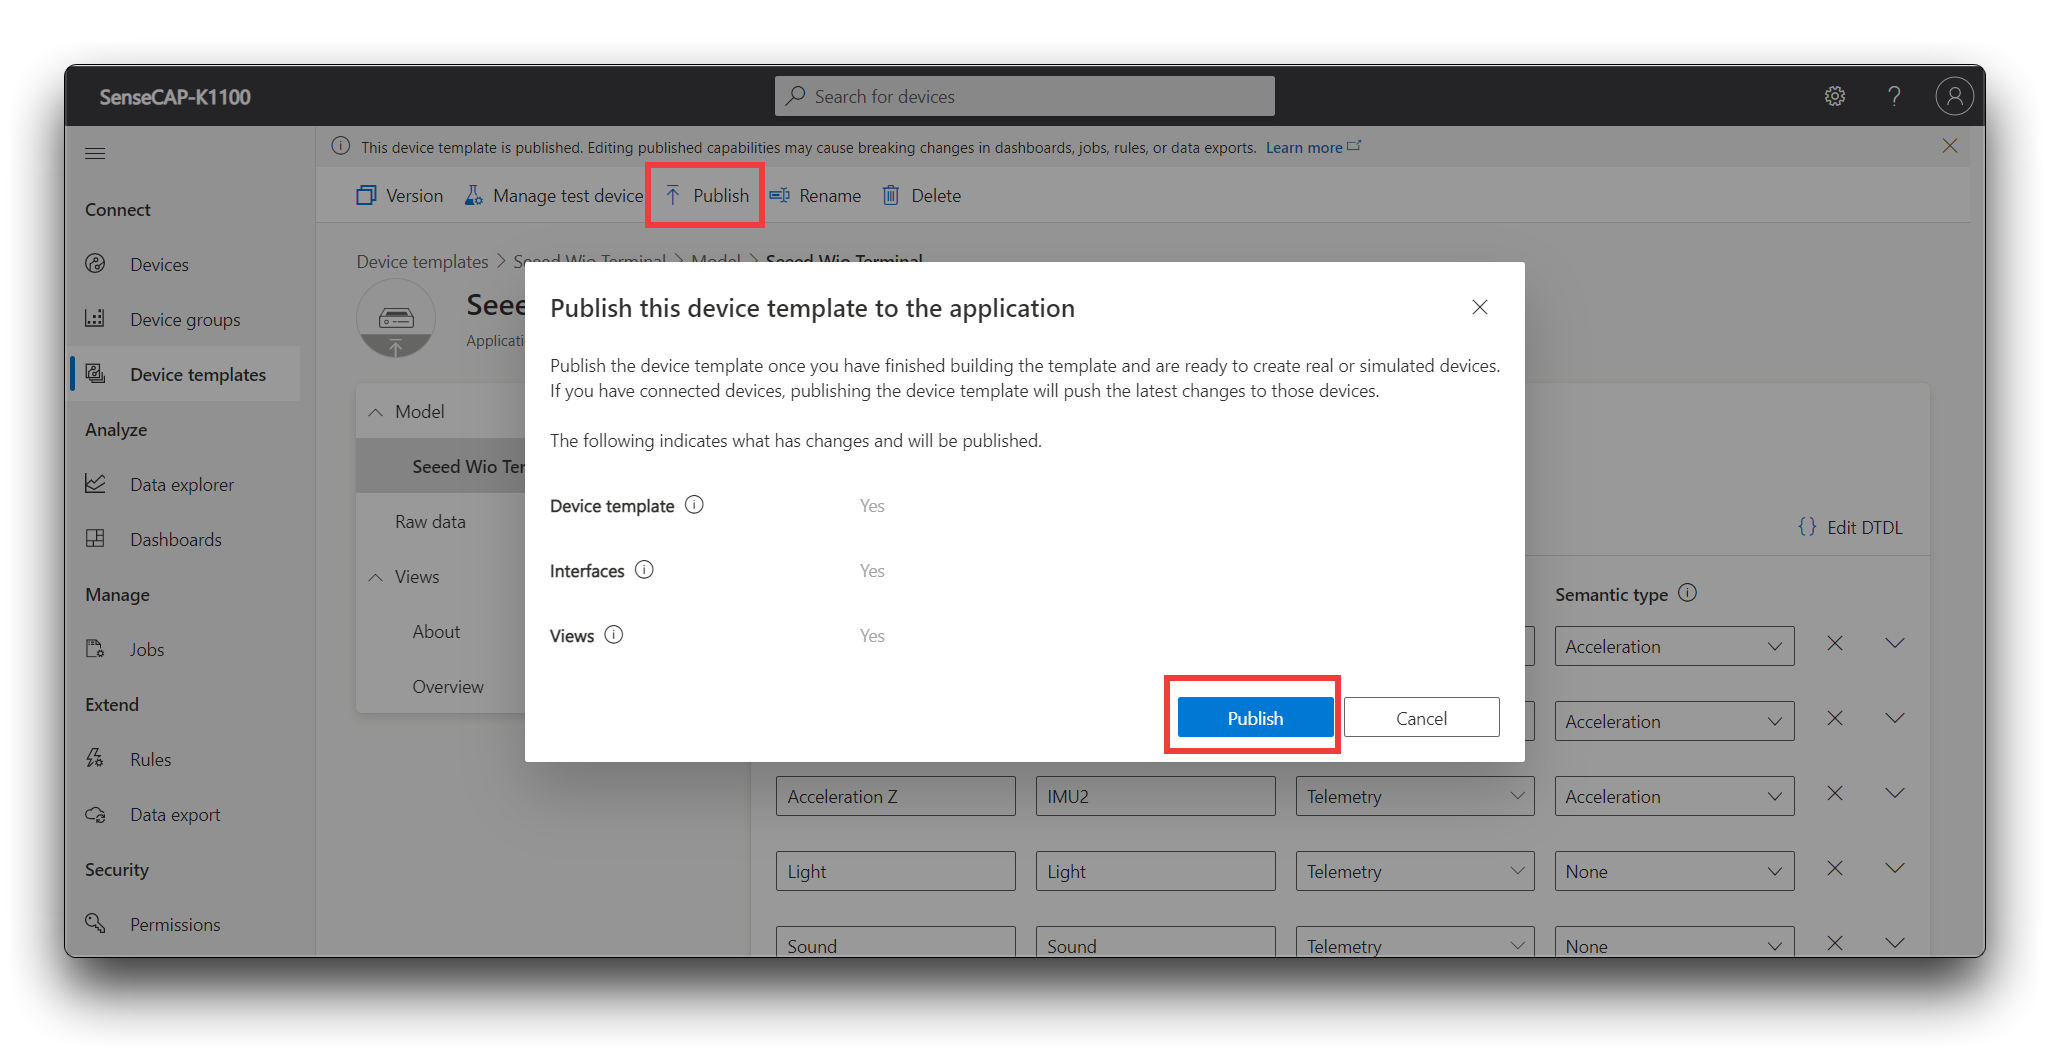
Click Save & Click Publish.
Open Azure IoT Central Dashboard that you visited before. Click on Devices from the left navigation menu. You will see Seeed Wio Terminal appear under Devices. Click on it.
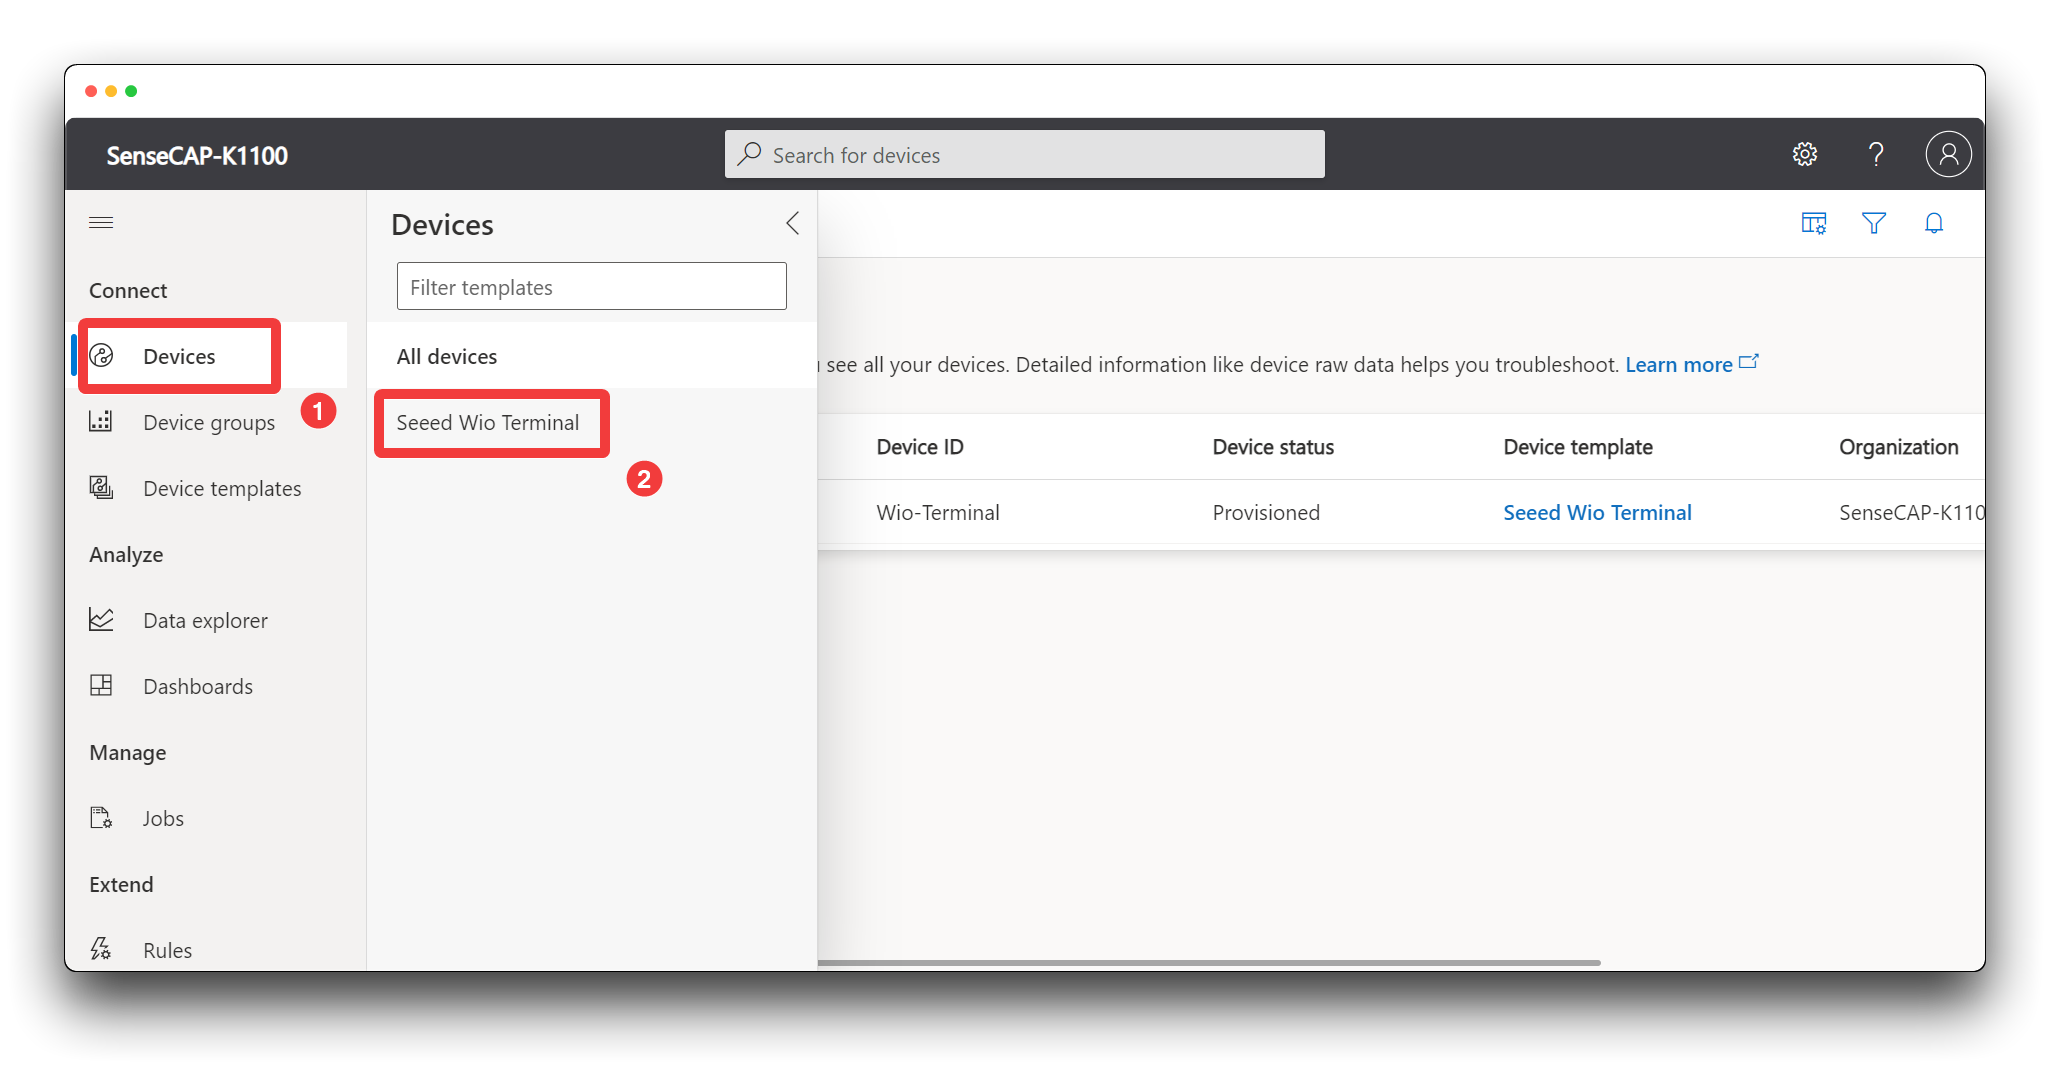
Click on the entry with the device name that you configured before.

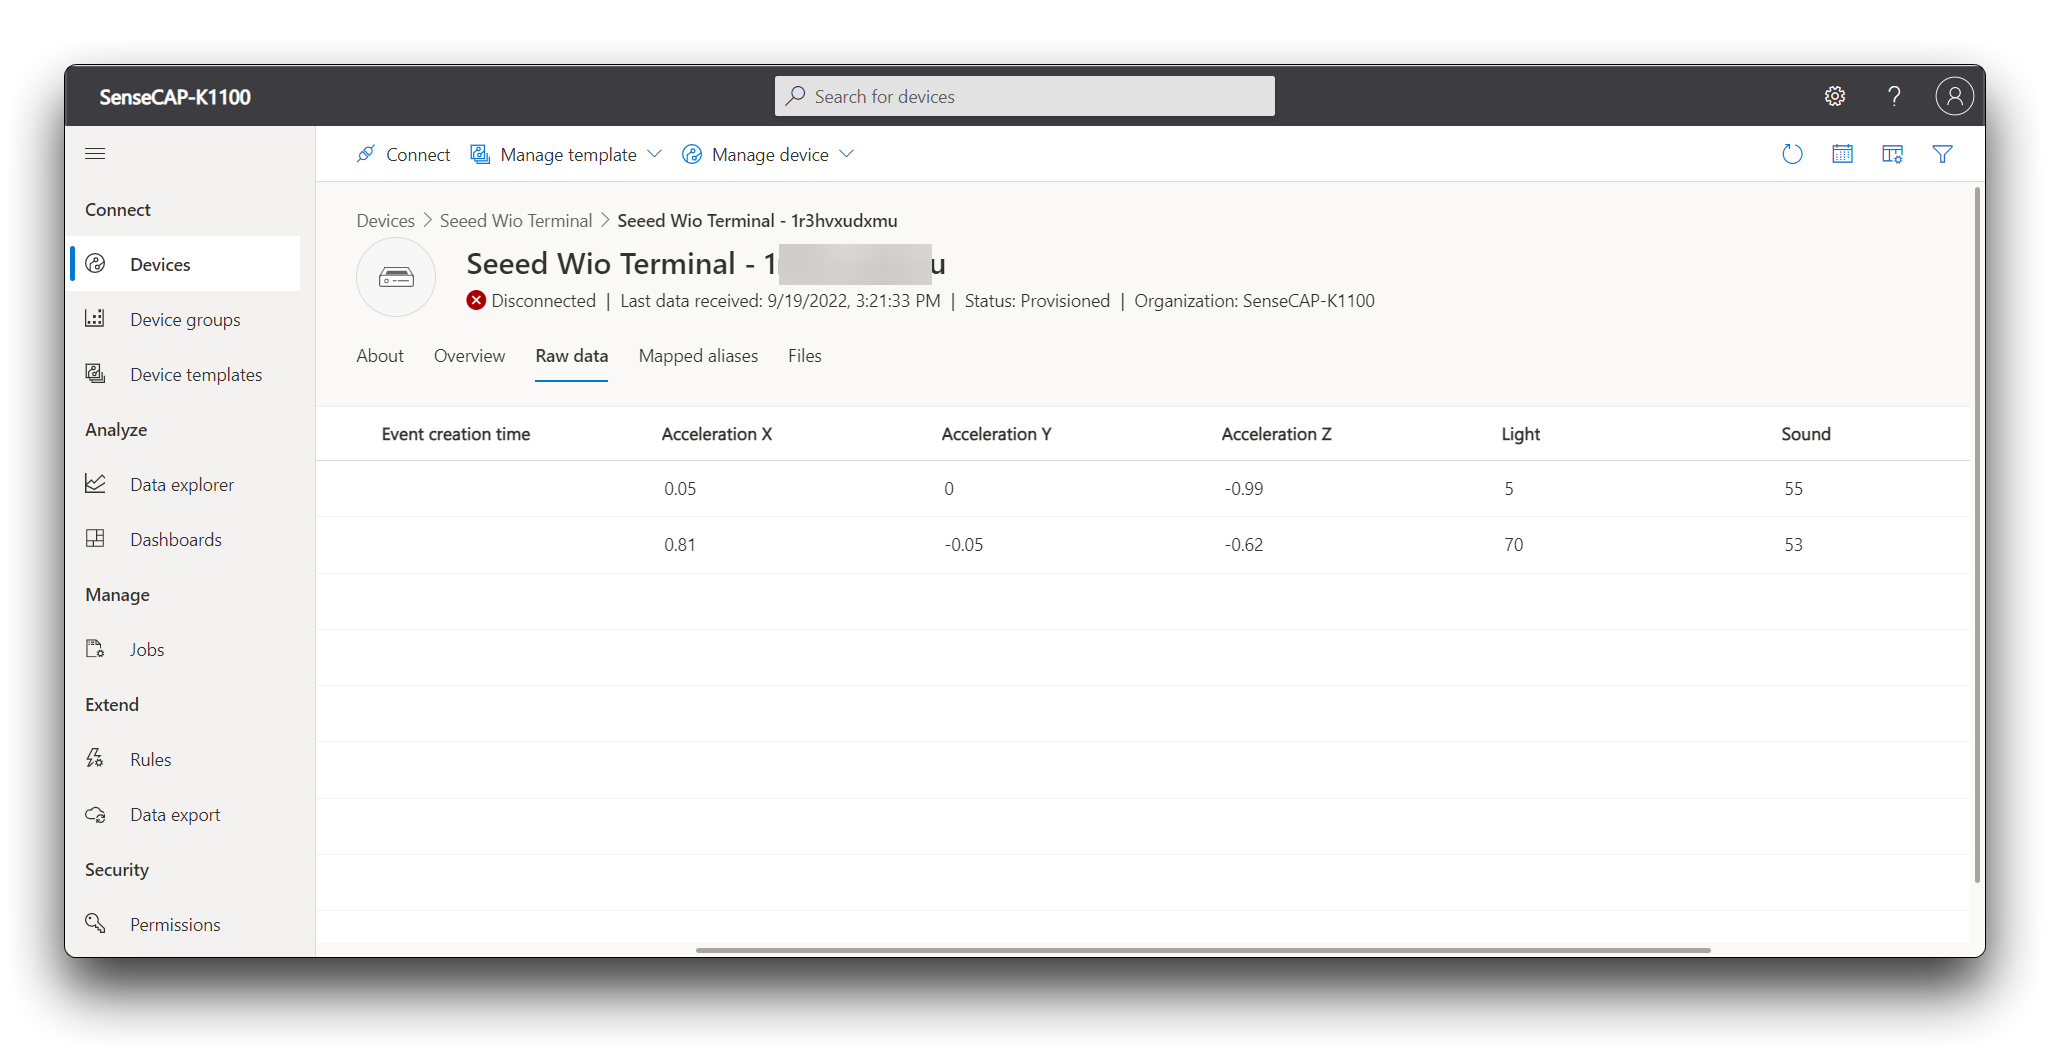
You can also click on the Raw data tab to view all the telemetry data in real-time.
Tech Support
Please do not hesitate to submit the issue into our forum.
Upgradable to Industrial Sensors SenseCAP K1100 serves as a gateway to the higher-end SenseCAP LoRaWAN® series of industrial outdoor sensors. Users can prototype multiple AIoT applications with this kit, after which they can scale them up to the robust, long-life, and industrial SenseCAP sensors.
